Welcome To Our Irrigation Library!
Preparing For Irrigation in Landscaping
Thinking forward is always a good strategy and especially is when you are planning to have irrigation system in your newly landscaped garden. This scheduling guide serves some advice regarding the best preparing techniques for installing irrigation in landscaping projects. Useful for landscapers or someone who build his own garden himself.
Plenty of clients start to think about automatic irrigation after they relalised that how much effort and what a huge cost to get the garden planted. Ubviously noone wants to loose the valuable plants in a two-week summer drought.
Irrigation in landscaping projects
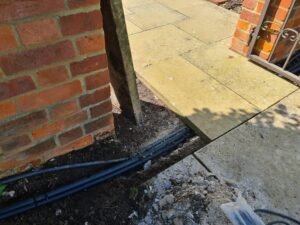
Installing a system comes with laying underground pipes from the water source to the areas and even under some areas like the lawn. When the pipes and wires have to cross hard surfaces, then the challenge is raising. If the installation will start after the hard landscaping, then slabs, pavings may become necessary to dismantle for implementing the crossings.
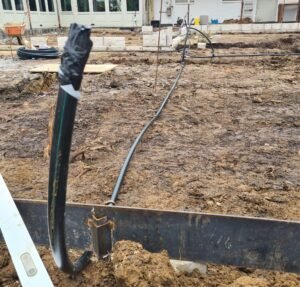
If the pipes have to run under the lawn (and this is the case at popup sprinklers), then laying them mus thappen before turfing but even better before the topsoil filling.
So the best time to start installing irrigation systems is right before the hard landscaping stage. Any later installation may lead to unaesthetically exposed feed pipes and laying difficulties. Best thing you can do is to share the landscaping drawings or imagination with the irrigation company as early as possible. They will let you know how to prepare your garden.
We always assume at the quoting that the installation can be performed by this schedule below, hence our prices are calculated by taking this into consideration. Any deviation might cause raising of the installation costs and will become chargeable.
Scheduling irrigation tasks during landscaping projects
Design phase of Irrigation System
This is the stage when you can do the most and get a well-working irrigation system.
Fractional layout
Try to avoid a too fractional layout.
Narrow paths with lawn or lawn/border combo are the worst as the lawn sprinklers makes (part) circles hence irrigating a 1 m or less wide turf stripe without spraying over on walls or path can be a real nightmare and very costly. Any later maintenance of this narrow lawn is difficult anyway because the mower will throw the cutting on the path, how can you aerate it, etc. We recommend to plant these stripes with ground cover plants. They can be irrigated nicely with hidden dripline (see details below).
Access
Provide access to both the front and back garden for a 900mm machine. Trenchers, diggers can make any later jobs easier and cheaper.
Water and power source
Design garden taps for both the front and the back garden, ideally not on the house wall but on the green side.
Make sure your garden tap(s) can be turned off independently from the house taps and the isolator tap has easy access, preferably at a frost-free location. Even better, if the garden water has its own water meter to reduce the water bill.
Make sure you have at least one power socket on the green side, not only on the house wall.
Implementation phase
When the works are already in progress you still have chance to aid a later installation.
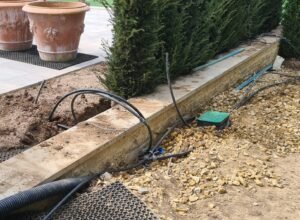
Ducting
Ducting is always a good idea. Unfortunately most of landscapers, builders don’t think forward.
1., Lay down at least 60mm ducts under hard surfaces between any landscaped part of the garden. You never know when your client changes his mind and want irrigation, water, power, audio equipments, led lights, etc. in any part of the garden.
2., Make sure of that the ducts are not blocked, laid as straight as possible without kinks and squashed sections.
3., Close their ends with gorilla tape to prevent the entry of any waste or soil. Don’t use perforated ducts if possible.
4., Make a note of their location.
Connection with rain harvesting
If you install underground rain harvesting tank, then think of a later connection to the garden (ducts again!) and supplying power for pump. Also think of the later service and don’t install heavy manhole cover.
Beds
Normal dripline cannot be covered with soil because the roots will block the emitter holes. Hence it’s advised to leave them uncovered or cover with mulch or chipping.
For neat bedding we recommend to excavate soil for making lowered beds by 10cm as per the drawing below:
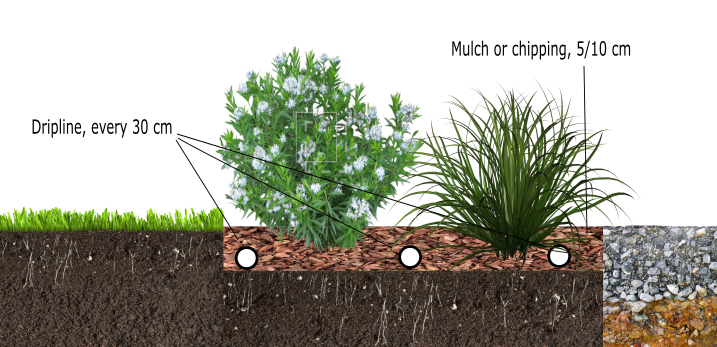
When the plants are in, the dripline has been laid, then the bed can be filled up to the finel level with mulch.
Compaction
Other common problem to struggle with is the differently compressed grounds. If one section has good drainage but the other doesn’t, an evenly designed irrigation system will overfill the compacted area with water whilst the other part remains in good condition.
Verdict
Try to prepare the garden for every future situation, I mean make the garden flexible. In this case, any challenge may become sorted without breaking hard surfaces up and a thoroughful implementation will make working of a new irrigation system problem-free.
Something Amiss?
Please let us know what you want to read about in this article and we will add it as soon as possible.