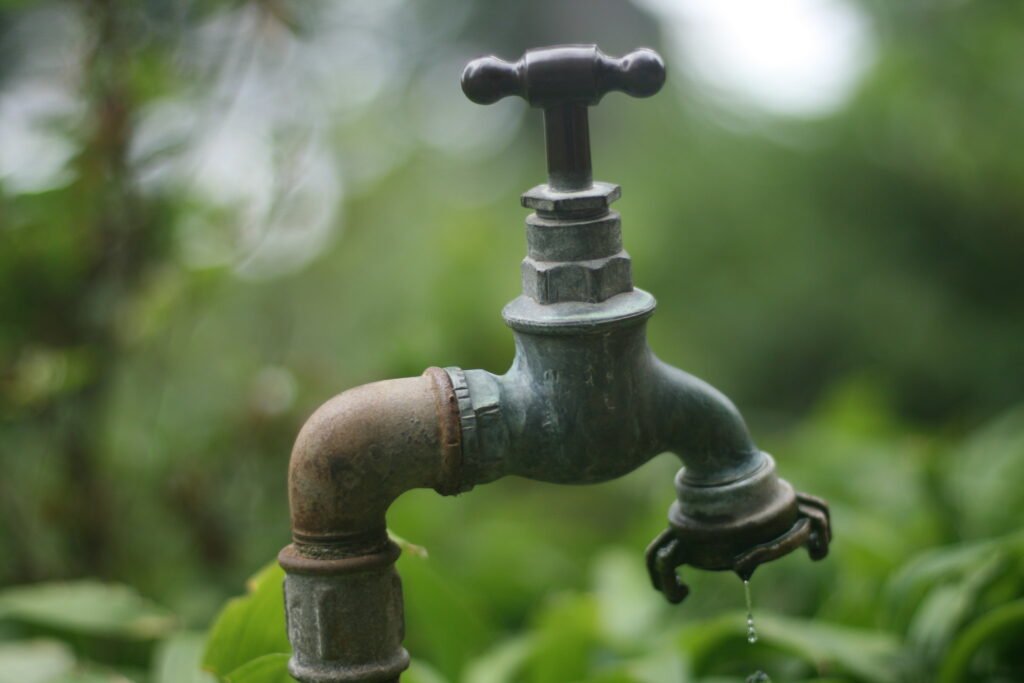
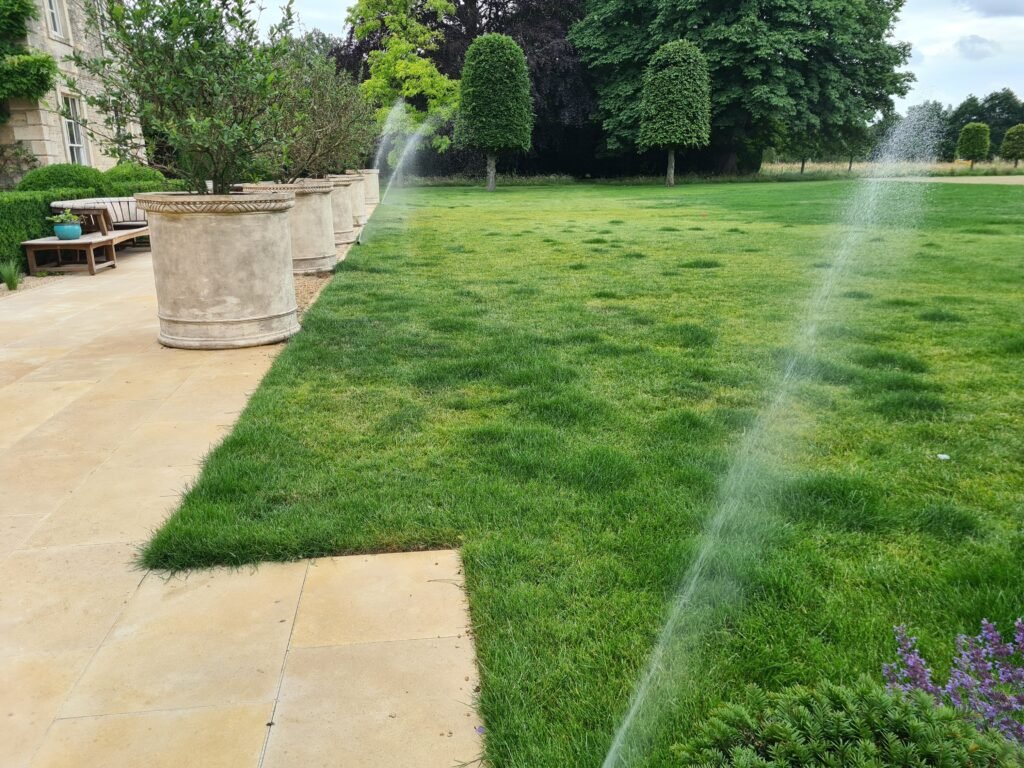
Everything You Wanted To Know About Garden Irrigation Systems
Our Irrigation Library stands as a comprehensive repository, offering a wealth of valuable articles encompassing the intricate world of automatic garden irrigation systems. This encompassing guide is an invaluable resource, covering various aspects such as system components, installation techniques, and maintenance protocols.
Finally you can find articles about our recent installation and service jobs where you can learn about our standards and unique solutions.
Welcome To Our Irrigation Library!
- 6 reasons why you need irrigation system
- Ultimate Pot Irrigation Solutions From Local Specialist
- Horror: How to program irrigation controllers?
- Expert Guide For Spring Opening Of An Irrigation System
- Pipe chewed by a squirrel
- Bad solenoid connections
- Rain harvesting
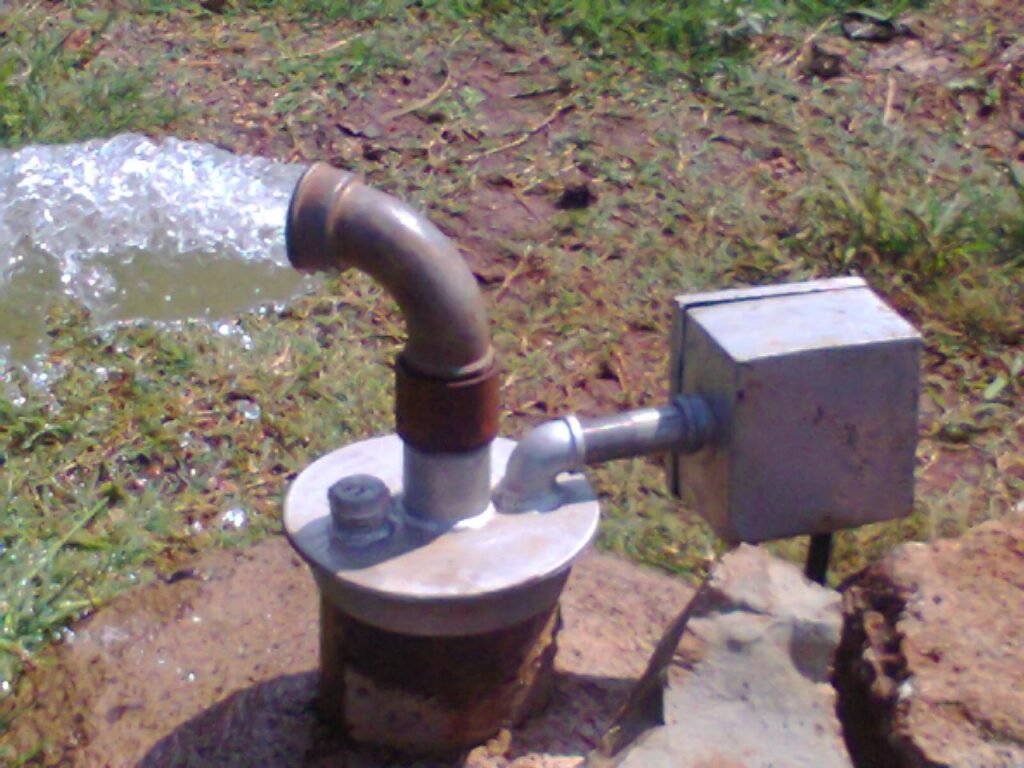
- Well / Borehole
- Boosting
- Zones, programs and cycles
- The Benefits of Automatic Irrigation Systems for Pot and Planter Irrigation in Hot Summers
- Irrigation System Installation On A Large Property Near Peterborough
- Evaluating the Costs and Challenges of Retrofit Rain Harvesting
- Increase your property value by getting irrigation system installed
- Aftercare Service From The Only Irrigation Specialist In Cambridgeshire
- Unlock the Secret to a Lush Oasis: The Crucial Role of Regular Maintenance For Your Garden Irrigation System
- Successful Compliance For Water Regulations
- Water Source for Irrigation Systems
- Hose Watering Vs Irrigation Systems
- Explore Irrigation System Management
- Heart Valve Of Irrigation: Distribution unit
- Expert Guide For Spring Opening Of An Irrigation System
- 6 reasons why you need irrigation system
- Increase your property value by getting irrigation system installed
- Successful Compliance For Water Regulations
- Aftercare Service From The Only Irrigation Specialist In Cambridgeshire
- Zones, programs and cycles
- Emergency situations
- How irrigation systems work
- Preparing For Irrigation in Landscaping
Thinking forward is always a good strategy and especially is when you are planning to have irrigation system in your newly landscaped garden. This scheduling guide serves some advice regarding the best preparing techniques for installing irrigation in landscaping projects. Useful for landscapers or someone who build his own garden himself.
Plenty of clients start to think about automatic irrigation after they relalised that how much effort and what a huge cost to get the garden planted. Ubviously noone wants to loose the valuable plants in a two-week summer drought.
Irrigation in landscaping projects
Installing a system comes with laying underground pipes from the water source to the areas and even under some areas like the lawn. When the pipes and wires have to cross hard surfaces, then the challenge is raising. If the installation will start after the hard landscaping, then slabs, pavings may become necessary to dismantle for implementing the crossings.
If the pipes have to run under the lawn (and this is the case at popup sprinklers), then laying them mus thappen before turfing but even better before the topsoil filling.
So the best time to start installing irrigation systems is right before the hard landscaping stage. Any later installation may lead to unaesthetically exposed feed pipes and laying difficulties. Best thing you can do is to share the landscaping drawings or imagination with the irrigation company as early as possible. They will let you know how to prepare your garden.
We always assume at the quoting that the installation can be performed by this schedule below, hence our prices are calculated by taking this into consideration. Any deviation might cause raising of the installation costs and will become chargeable.
Scheduling irrigation tasks during landscaping projects
Design phase of Irrigation System
This is the stage when you can do the most and get a well-working irrigation system.
Fractional layout
Try to avoid a too fractional layout.
Narrow paths with lawn or lawn/border combo are the worst as the lawn sprinklers makes (part) circles hence irrigating a 1 m or less wide turf stripe without spraying over on walls or path can be a real nightmare and very costly. Any later maintenance of this narrow lawn is difficult anyway because the mower will throw the cutting on the path, how can you aerate it, etc. We recommend to plant these stripes with ground cover plants. They can be irrigated nicely with hidden dripline (see details below).
Access
Provide access to both the front and back garden for a 900mm machine. Trenchers, diggers can make any later jobs easier and cheaper.
Water and power source
Design garden taps for both the front and the back garden, ideally not on the house wall but on the green side.
Make sure your garden tap(s) can be turned off independently from the house taps and the isolator tap has easy access, preferably at a frost-free location. Even better, if the garden water has its own water meter to reduce the water bill.
Make sure you have at least one power socket on the green side, not only on the house wall.
Implementation phase
When the works are already in progress you still have chance to aid a later installation.
Ducting
Ducting is always a good idea. Unfortunately most of landscapers, builders don’t think forward.
1., Lay down at least 60mm ducts under hard surfaces between any landscaped part of the garden. You never know when your client changes his mind and want irrigation, water, power, audio equipments, led lights, etc. in any part of the garden.
2., Make sure of that the ducts are not blocked, laid as straight as possible without kinks and squashed sections.
3., Close their ends with gorilla tape to prevent the entry of any waste or soil. Don’t use perforated ducts if possible.
4., Make a note of their location.
Connection with rain harvesting
If you install underground rain harvesting tank, then think of a later connection to the garden (ducts again!) and supplying power for pump. Also think of the later service and don’t install heavy manhole cover.
Beds
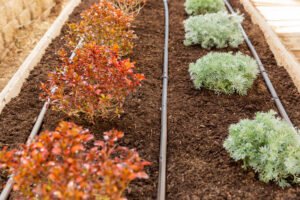
Normal dripline cannot be covered with soil because the roots will block the emitter holes. Hence it’s advised to leave them uncovered or cover with mulch or chipping.
For neat bedding we recommend to excavate soil for making lowered beds by 10cm as per the drawing below:
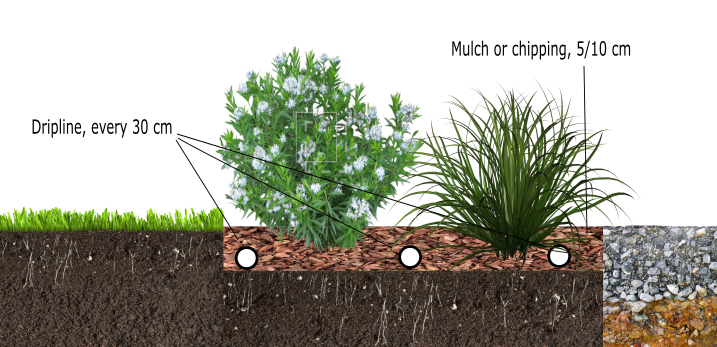
When the plants are in, the dripline has been laid, then the bed can be filled up to the finel level with mulch.
Compaction
Other common problem to struggle with is the differently compressed grounds. If one section has good drainage but the other doesn’t, an evenly designed irrigation system will overfill the compacted area with water whilst the other part remains in good condition.
Verdict
Try to prepare the garden for every future situation, I mean make the garden flexible. In this case, any challenge may become sorted without breaking hard surfaces up and a thoroughful implementation will make working of a new irrigation system problem-free.
Something Amiss?
Please let us know what you want to read about in this article and we will add it as soon as possible.
The Ingenious Mechanism Behind Automatic Garden Irrigations Work
Maintaining a lush and vibrant garden requires consistent and efficient watering, a task made seamless by the wonders of automatic garden irrigation systems work. These sophisticated setups bring a blend of technology and horticulture to ensure optimal plant health and water efficiency.
Automatic garden irrigation systems are designed to alleviate the burden of manual watering, offering a precise and tailored solution for each garden’s unique needs. The key components of these systems include a central control unit, various emitters, pipes, and valves, all working in harmony to distribute water strategically.
Central Control Unit: The Brain of the Operation
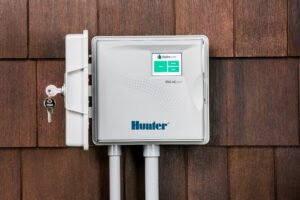
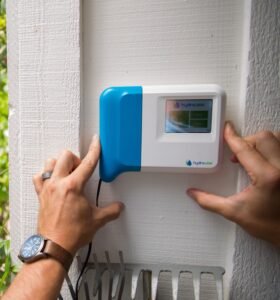

At the heart of every automatic irrigation system lies the central control unit. This intelligent device acts as the brain, orchestrating the entire watering process. Gardeners can program the unit to dictate when and how much water is distributed, allowing for customizable schedules based on the specific requirements of different plants and zones.
The Gardener’s Rain always use the best quality irrigation parts and equipments from market-leader companies.

Sensing and Adapting: Smart Water Management

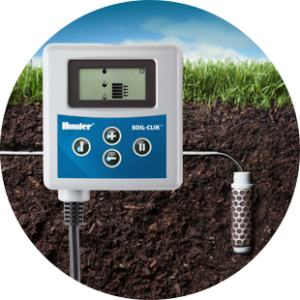

Modern systems often incorporate sensors such as rain sensors or soil moisture sensors. These devices enhance the system’s responsiveness to environmental conditions, preventing overwatering during rain or adjusting for variations in soil moisture levels. Smart controllers, equipped with Wi-Fi capabilities, utilize historical and forecasted weather information, ensuring efficient water usage.
Water Source Options: Tailoring to Garden Needs
Automatic irrigation systems can be connected to different water sources, including the mains, rain-harvesting systems, boreholes, or live water sources. Each source has its unique considerations, and the system adapts accordingly. For example, rainwater harvesting systems require additional measures to avoid temporary water shortages.
Raising the Water Volume: Boosting
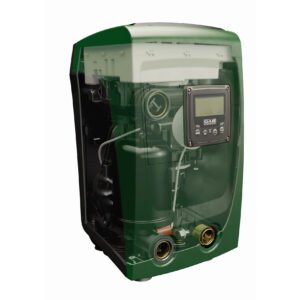
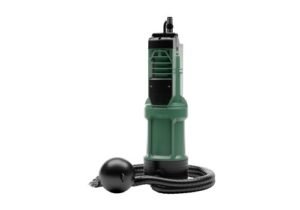
Boosting in the context of irrigation systems refers to the process of enhancing water pressure or flow to meet the requirements of the system. This is typically necessary when the natural water pressure from the source is insufficient to operate the irrigation system effectively. Boosting can involve the use of additional equipment, such as pumps, to increase pressure and ensure adequate water distribution throughout the system.
Installation and Zoning: Precision in Action
Professional installation is crucial to achieving the system’s optimal performance. Zoning, the grouping of similar emitters together, ensures that areas with similar water requirements are irrigated together. The size of each zone is determined by factors like water consumption, water flow, and operating pressure of the emitters.
Emitters: Tailoring Water Delivery
Emitters, including popup sprinklers, micro sprinklers, drip lines, and bubblers, serve as the system’s hands, precisely delivering water to designated areas. Micro sprinklers provide a gentle rain-like mist, drip lines offer targeted root-level hydration, and bubblers emit water in a controlled pattern. The selection of emitters depends on factors such as plant type, size, and local climate conditions.
Pipes and Valves: Efficient Water Transportation
A network of pipes facilitates the seamless transportation of water from the source to the emitters. Well-designed systems employ pipes of varying diameters, strategically laid out to minimize pressure drop and ensure even water distribution. Valves, controlled by the central unit, act as traffic managers, opening and closing to regulate water flow to specific zones.
Maintenance: Ensuring Longevity
Regular maintenance is the key to the longevity of an automatic irrigation system. This involves inspecting and cleaning emitters, checking for leaks, and ensuring that all components are functioning correctly. Well-maintained systems contribute to water conservation, preventing unnecessary water wastage.
Contracting with us is always the best practice to keep your investment in the best condition.
Conclusion: A Greener Tomorrow with Automated Efficiency
In conclusion, automatic garden irrigation systems work represents a marriage of technology and nature, ensuring that our gardens thrive with minimum effort and maximum efficiency. As we continue to embrace sustainable practices, these systems stand as a beacon of innovation, promising a greener and more water-conscious tomorrow.
In case of an emergency situation you have to find as much information as possible to eliminate it. There are couple of intervention points of an irrigation system to do it.
First point is the first main isolator valve. In case of a continuous leak it’s recommended to turn off.
Also advised to switch the electric isolator of the controller off to prevent the system running. In lack of this switch, turn the dial of controller to off if it exists. There are different methods to do it on battery controllers, please refer to the User manual.
In case of a boosted system switching off the power supply of pump is also advised. Usually the emergency switch is nearby the pump at an accessible place for emergency purposes. It can be a socket switch, fuse box, circuit breaker, rotating switch, etc.
If you don’t find it, try to follow the cables start from the pump (possibly come up from the tank) till you find the isolator switch.

Irrigation zones refer to specific areas within a landscape that share similar water requirements. These zones are created to optimize water distribution and cater to the diverse needs of different plants, taking into account factors such as plant type, size, and local climate conditions.
From design side considering efficiency, a zone is a unit which use the maximum possible amount of flow provided by the water supply on a certain pressure and also includes identical type emitters.
Zones are groups of emitters connected together with pipework to irrigate same plants or plant groups on equal way by the same program at the same time. Zones can be grouped on different ways.
Similar Water Needs
Each irrigation zone consists of plants or areas with similar water requirements. For example, lawns, flower beds, trees, and shrubs may be grouped into separate zones based on their distinct needs for water.
Efficient Watering
Grouping plants with similar water needs into zones allows for more efficient watering. The irrigation system can be programmed to deliver the appropriate amount of water to each zone, avoiding overwatering or underwatering.
Customized Scheduling
Different zones may have varied watering schedules based on factors like sunlight exposure, soil type, and plant species. Customized scheduling ensures that each zone receives water at the optimal time and frequency.
Emitters and Water Distribution
The choice of emitters (such as sprinklers, drip lines, or bubblers) in each zone is tailored to the specific needs of the plants within that zone. This ensures precise water distribution, considering factors like coverage area and water flow.
System Flexibility
Irrigation zones provide flexibility in managing water resources. For instance, during dry periods, zones with drought-resistant plants may require less frequent watering compared to zones with more water-sensitive vegetation.
Zoning Criteria
The creation of irrigation zones involves considering factors such as plant type, soil conditions, sun exposure, and topography. Professional installers use these criteria to design an irrigation system that maximizes efficiency and promotes healthy plant growth.
Group of zones
By dividing the landscape into irrigation zones, gardeners and irrigation professionals can optimize water usage, minimize water wastage, and promote the overall health and vitality of plants. This zoning approach is a fundamental strategy in the design and management of effective automatic garden irrigation systems.
By irrigated plants
- lawn
- bed
- planter/pot
- tree
By emitters
- popup sprinklers
- micro sprinklers/field stands
- dripline
- planter/bubbler
Programs
Zones are organized into programs, running sequentially from the program’s start. Irrigation programs refer to predefined schedules or sequences that dictate when and how an irrigation system should operate.
These programs are essentially a set of instructions programmed into the irrigation controller, specifying when each zone or set of emitters should be activated and for how long. Irrigation programs are essential for optimizing water usage, ensuring proper plant hydration, and adapting to specific landscape needs.
Programs can be scheduled to run multiple times a day if needed. If different zones require varying start times for any reason, setting up additional programs provides the flexibility required. For instance, flower beds can be watered before nightfall, while the lawn is tended to at dawn.
Key components and concepts
- Start Times*: Programs include start times, indicating when the irrigation cycle begins. Multiple start times may be scheduled throughout the day, especially in hot climates or for areas with specific water requirements.
- Run Times: The run time specifies how long each zone will be watered during a particular irrigation cycle. This duration is based on factors such as plant needs, soil type, and weather conditions.
- Frequency*: The frequency determines how often the irrigation program repeats. It can be daily, every other day, multiple times a week, or according to a customized schedule.
- Seasonal Adjustments: Some advanced irrigation controllers allow for seasonal adjustments, automatically adapting the irrigation schedule based on changes in weather conditions or plant water requirements. As simple as it sounds: increasing the adjusmtent by 5% will increase each running time by 5%.
- Manual Overrides: Irrigation controllers usually have manual override options, allowing users to start or stop irrigation outside of the programmed schedule when necessary.
At most controllers, the frequency and the desirable start time will determine a program. Same program cannot be started on different zones at different time or different days.
Here’s a simple example of an irrigation program for a residential garden:
- Zone 1 (Lawn):
- Start Time: 6:00 AM
- Run Time: 15 minutes
- Frequency: Every other day
- Zone 2 (Flower Beds):
- Start Time: 7:30 AM
- Run Time: 20 minutes
- Frequency: Every day
These programs ensure that different areas of the landscape receive appropriate and tailored irrigation based on their unique needs.
This post is for diy-ers and the difficulty level is medium 😀. These steps might be useful for most of the systems but not for all of them.
If your irrigation system is not a simply luxurious one but it was installed due to its usefulness you probably feel the sparing important besides the environment friendliness.
Fortunately, the process of spring opening or recommissioning your irrigation system is not overly complicated. The main objective of this task is to ensure that all functions are in working order and to prepare the system for the upcoming summer season. So, let’s get started and fire it up!
Initial steps
Visible pipework and valve boxes
Before turning on the water supply, it is essential to inspect the visible pipework for any signs of disconnection or damage. This precautionary measure also extends to the solenoids found in valve boxes.
Certain irrigation companies adopt the practice of leaving these solenoids open or dismantled during the winter season. The reasoning behind this is to prevent any potential frost damage caused by residual water remaining within the solenoids.
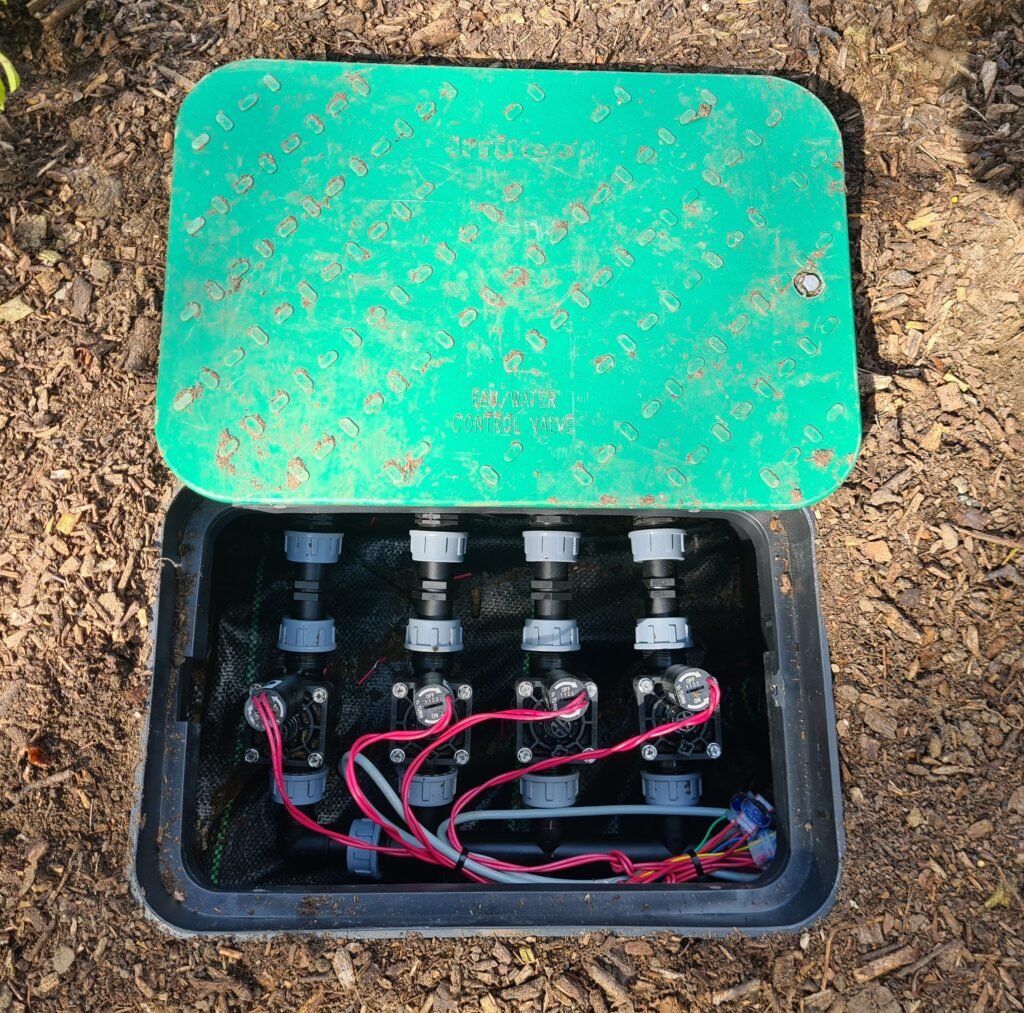
If the solenoids are dismantled, lift their top up and check. They should not be dirty inside because any contamination could prevent them working properly. Usually a rubber membrane and a spring can be found inside them. In lack of these, the solenoids are not able to work. Put the screws back and tighten them up properly.
Screw the coil (a plastic cylinder) back in and check that the manual switch on its side (if any) is in “Auto” position. If no any text on it, the switch must be parallel with the longitudinal axis of the coil.
Open any isolator tap in the valve box(es). Usually their handle must be parallel with longitudinal axis of the tap when it’s open.
Repeat this process at each valve box belongs to the system as the most boring process of every spring opening.
Open mains
Now open the main isolator tap. This can be anywhere on a system but you must know it because that is a kind of emergency isolator at bursting for example. Test the tap to make sure it turns freely and not dripping.
Firstly switch on the power of controller and if it’s necessary attach the plugs of controller and pump/relay in the socket(s).
If you have a battery controller, then change the batteries before recommission it. We recommend to start the season with new batteries to avoid a downtime during the summer when you are on the seashore for two weeks far away from your garden.
Some traditional controllers have emergency batteries to hold the time at a shortage. Check the condition of this battery on the screen (battery symbol) and replace it if necessary.
Systems with pump
If your system works from main water (you don’t have tank and pump) then you can skip the next chapter.
Around the tank
On a pump system next step is to check filling up of the tank. Underground tanks are likely to be filled up via ball valves. You have to find a pipe that comes from the water source and ends inside the tank with a ball valve. You may find an isolator tap on this pipe. Make sure that the tap is open to let the water fill the tank.
Taken lid of tank off you have to reach the ball. When you push it down carefully the water is flowing into the tank. When you release it the water must stop. You have to be sure it happens. If the ball valve doesn’t stop the water flowing then that will cause flood around the tank and a big money waste.
At an underground tank the things are slightly different. Opening and closing of the main water is usually managed by a solenoid and a float switch connected to it. First check the solenoid if the manual switch is in “Auto” position (refer to the previous paragraphs).
There must be some cable run into the tank. One of them must go to the pump and there might be one or more float switches besides it. If you are not sure which one is responsible for closing the main water just pull them up one by one. When you lift up the right one and its float ball is turning down the solenoid will be operating and the water starts flowing in the tank. Release the cable carefully just to make sure it isn’t got stuck anywhere. When the float ball is pointing upwards the water should stop. Very important to make sure this operation works perfectly unless you will waste lots of money without noticing it because the redundant water will leave the tank on the overflow pipe straight away.
Rain harvesting
If your tank is part of a rain harvesting system as well there should be a mechanical filter connected on the rainwater inlet(s). As long as you are around that it worths to clean it for giving the rain harvesting system a spring opening as well.
Submersible pumps
Most of underground tanks and lots of overground ones have submersible pump.
Water outlet of these pumps can be sorted on two different ways basically. One of them is quite simple: pipe from the submersible pump comes up and connected to the pipework runs to the solenoids. At this case there is no need to do anything with this part.
The other one when there is a bypass installed on the pipe. Water comes up from the pump and being forced to take a small run via this bypass back in the tank. Other parts of the system are isolated by a tap or cockstop. This is for making a winter cycle when the pump is programmed to run frequently to avoid water freezing in the tank and get the pump damaged. At that case if the bypass is active you have to isolate that and open the tap leading to other parts of the system. Otherwise the water pumped up will be going back in the tank.
Pumps outside the tank
The pump must have been drained in the autumn. They have a bleeding and a draining point at the propeller end, closed by screws or caps. First screw the lower one (the drainage point) back in.
Fill up the propeller house with clean water via the upper point (the bleeding point). We recommend doing this even if you have a self-priming pump. Use a watering can or other accessories with narrow bead. Screw the bleeding screw back in when the water reached the bleeding point.
After this operation, switch on the power of pump.
Normally the water outlet is on top of the pump. You can find a few other equipment installed like pressure vessel, gauge, isolation tap and solenoid after this point. Check if the isolator tap is open and the solenoid is in “Auto” position.
Testing of system
Hereupon you can start testing. Based on type of your controller there are several variations for manual start. Best to look through the manual. If you don’t find yours download the most popular ones directly from their official site here (Hunter, Rain Bird, Weathermatic, Orbit)
Fire up the first zone. If the solenoids are nearby, a clicking noise can be heard from there. At a pump system, a clicking noise can come from the relay as well and obviously the pump will start too.
If it doesn’t happen and surely everything in this guide has been done it’s worth to try to shake and/or lift up the pipe coming up from the pump. Namely the propeller could stick in the wintertime and this small movement definitely could help to give it a mechanical push.
When the first zone run, you can check working of the emitters on that zone. Depending on the length of pipework some time has to pass before the water starts flowing/dripping/jetting.
Pop-ups
Pop-up jets need to reach or at least approach the neighbour head(s) around them. Of course the heads need to turn around within their set angle.
You can adjust the Hunter sprinklers with their specific key only. Other sprinklers can be set by tiny allen key or flat screwdriver. Refer to the brand written on top of the sprinkler head.
Walk to each head (try to avoid the water jets 😀) and have a look if there is no serious water leaking around the heads or rising water anywhere referring to any leak on pipes.
Repeat these on each lawn zone.
Beds
Prior to starting bed zones with micro sprinklers visually check their position and condition. Mount the fallen nozzles back and reposition the tilted stakes.
After start you can see or hear the holes, chews and cuts. Repairing these problems are esay either under pressure or at turned off zone. Use our Repair Kit. If you have affinity, order one from our site.
Planters and baskets
You have to check the emitters in planters and hanging baskets one by one. If there are no plants in them yet turn off the adjustable bubblers for reducing the useless water consumption.
Sensor check
Good news is you are over the hardest job in spring opening of your irrigation system. There couple of bits left.
Rain sensor
Go to the rain sensor and test it. You will probably find a small stick on its top. Push the stick in for couple of seconds and see if the feedback was coming up on the controller screen. Sometimes the screen cannot be seen from location of the sensor so you might need help to perform this action.
If you can’t move the stick either way probably the sensor got dirty. Firstly note the setting of the cap and take off it by turning carefully to the neutral position and pull up. Following that you can pull out the stick from its nest with its special rings together. Don’t let these rings fall because they are the most important parts of the sensor.
Clean the nest and the rings from spider webs, dirts, etc. Do the steps other way for assembly and test the sensor again.
If you are facing with a wireless sensor, then you can check its signal on the receiver panel installed on the side of controller. Most of the wireless sensor outdoor unit have unreplaceable batteries. If the batteries are flat, then there’s no other way then replace the whole unit.
Other sensors
You cannot test the moisture sensors. The only way you know they don’t work if your system stopped by the sensor (noticed on controller screen) and the soil is dry around it. Unfortunately their location is unknown most of the time.
Check the program
If you have done all these above the only thing to do is check the time and program on the controller. Run through the settings and check up them.
If everything fine turn the setting switch to “Run” or “Auto” position and switch of the sensor to “Active” or activate the sensor on the right way.
That’s all, finally you have finished the mysterious spring opening on your irrigation system.
From now on our system is ready. Our deal is enjoying the garden and the time saved on hand watering.
If you need help with your spring Recommission
Please be aware we don’t know your own system and especially we don’t know the installer of your system so we cannot guarantee you will find our guide 100% useful. If you have any problem in recomissioning your system please don’t hesitate to contact us. Our skilled engineers will give you expert advice regarding your problems and obviously ready to fix them.
And you can even request spring-autumn service guide tailored to your own system to make the yearly maintenance easy. Book now!
Installing and operating an irrigation system professionally comes with plenty of benefits, like consistent and efficient water use, time and cost-saving, increased plant health and property value and so on. Efficient water use and conservation contribute to environmental sustainability as well. But we can’t walk away from that an incorrectly installed system can lead to various negative impacts and breaking the rules is just one of them. However not to comply the recent water regulations can result in legal consequences, fines, or restrictions on water usage.
To avoid these unpleasant consequences, let’s look into to the latest relevant UK law, the Water Supply (Water Fittings) Regulations 1999. This law replaced the old Water Bylaws nearly a quarter century ago this is the only current standards in this field.

Reporting the installation
Before delving into the facts deeper, the first thing worth to mention that not any kind of irrigation system (other than a handheld hose) can be installed without prior consent of the water authority (local water board). The responsibility lies with the owner to inform and seek consent from the board before initiating the installation process.
Hazards To The Mains Supply
Connecting the irrigation system to the mains water supply may put the water bodies in risk as follows:
- Cross-Contamination: If the irrigation system is improperly connected, there’s a risk of cross-contamination between the potable water supply and the irrigation water. This can introduce contaminants, such as fertilizers or pesticides, into the drinking water system, posing health risks.
- Water Quality Issues: Improper connections may compromise the quality of water supplied to the irrigation system. Contaminants or impurities from the surrounding environment or non-potable water sources may enter the system, affecting the health of plants and potentially causing clogs or damage to the irrigation equipment.
- Environmental Impact: Contaminants introduced into the irrigation system may have adverse effects on the surrounding environment. Runoff containing pollutants can harm local ecosystems and water bodies.
Other RisksTo COmply With Water Regulations
Obviously an improper connection may cause issues for you as well, like these:
- Reduced System Efficiency: Incorrect connections may lead to pressure variations, inconsistent water flow, or inefficient distribution within the irrigation system. This can result in uneven watering, negatively impacting plant health and the overall effectiveness of the system.
- Equipment Damage: The introduction of impurities or contaminants from an improperly connected water supply can damage irrigation equipment, including valves, pipes, and emitters. This can lead to increased maintenance costs and the need for frequent repairs.
- Waste of Water: Inefficient connections may result in water wastage through leaks or inefficient distribution. This not only contributes to increased water bills but also contradicts the principles of water conservation and sustainable irrigation practices.
- Health Risks for Plants: Poor water quality due to incorrect connections can negatively impact plant health. Plants may suffer from nutrient imbalances, diseases, or reduced growth, leading to an unhealthy and unappealing landscape.
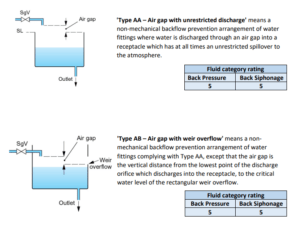
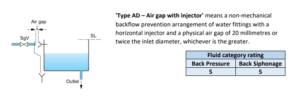
Regarding the possible effects above, the water regulations describe the minimal connection requirement for any type of irrigation system considering the different type of emitters used on the systems. The irrigation solutions are grouped into fluid categories based on certain properties and the acceptable connections are ordered to these categories.
Fluid categories
Preventative Equipments For Categories
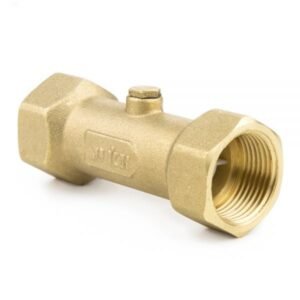
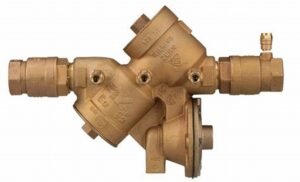
RPZ units
As the name of the Reduced Pressure Zone (RPZ) unit shows it’s meant to reduce the existing water mains pressure further. That’s for establishing a pressure difference between the mains side and the irrigation side on purpose. That makes the available pressure even lower so this solution is not suitable for most of the time.
Air gaps
As you may have worked out that the air gaps are supposed to interrupt the direct connection between the mains supply and the irrigation system. Obviously the available pressure and flow from mains will be lost by installing this solution. Hence our first task is to rebuild them after the air gap. This is the main reason for installing an irrigation pump.
Consequently, irrigation systems are better to be installed with tank and pump, except in the rear case when there are micro/field stand zones are designed only. Of course when the available pressure is strong enough to operate the sprinklers.
Irrigation systems designed by The Gardener’s Rain follow the latest water regulations. All our quotes contain the necessary connection types, so you don’t have to worry about it.
The good news
But there’s more then one side to a coin. Luckily installing a booster (pump and usually a tank) makes the system independent and scalable to your needs. It’s not just a costly requirement but makes the system design more flexible and expandable.
In summary, following water regulations ensures that irrigation systems operate safely, efficiently, and responsibly. It protects the environment, public health, and the integrity of water supplies while fulfilling legal requirements. Customers and professionals alike should stay informed about and adhere to these regulations to contribute to sustainable water use practices.
Water sources for irrigation systems play a pivotal role in ensuring the sustenance and vitality of landscapes by providing the essential resource needed to nourish plants and maintain their optimal growth. These water sources can vary significantly, catering to diverse irrigation needs, with each having its own unique characteristics and considerations that must be taken into account.
Most frequent solutions
Systems with Main Water
Mains water supply stands as the backbone of irrigation systems, delivering reliable and consistent water to nurture flourishing landscapes. This regulated water source ensures a steady flow, providing the essential life force for plants. Efficiency and convenience makes mains water supply the most trusted in water sources of irrigation systems.
In cases where a booster isn’t legally mandated and the existing pressure/flow can effectively operate the designed system, a mains-fed system emerges as a cost-effective solution. Connecting to the mains water network demands precision and employs various safety measures to avert cross-contamination.
When a booster is necessary, yet mains water remains the sole water source, the system is classified as a mains-sourced system. The connection to the mains water supply is executed with the same meticulous care to ensure optimal functionality.
Watering from Other Sources
If your garden boasts a borehole, rain harvesting system, or a nearby live water source, harnessing these free water reservoirs is a wise choice. However, these sources typically require some degree of boosting. To prevent temporary water shortages, storing at least one irrigation cycle of water is advisable before initiating the boosting process. In this regard, it’s essential to consider the potential challenges and requirements associated with boosting.
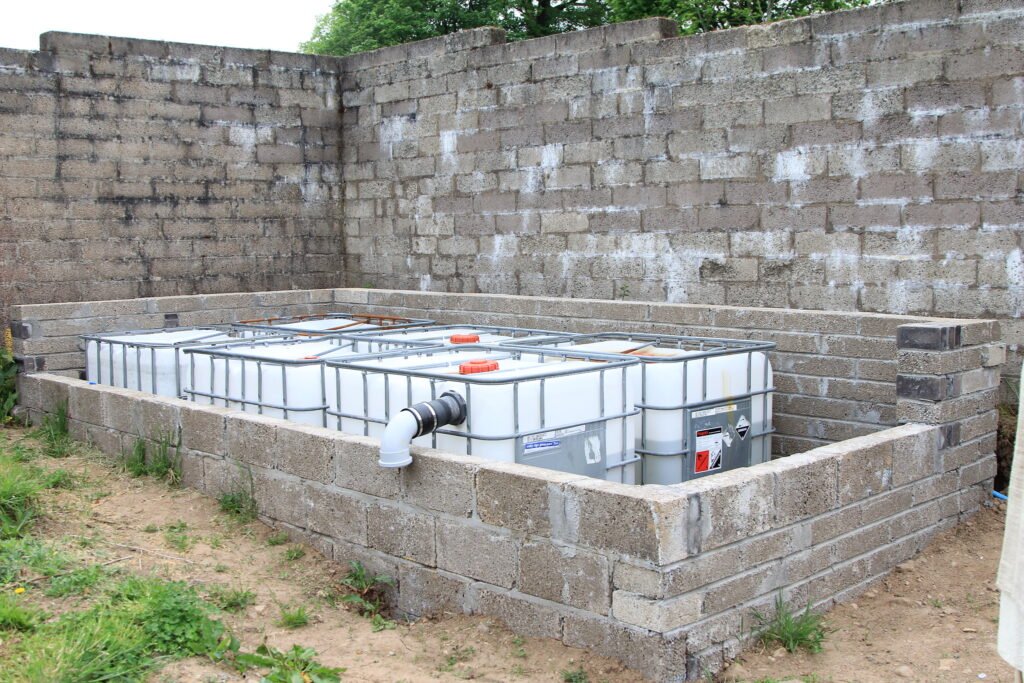
Furthermore, this storage can take place directly in the irrigation tank or in separate tanks; the choice depends on the price-value ratio and available space. Sometimes, this setup necessitates the installation of additional pumps, a crucial consideration for the overall effectiveness of the irrigation system.
Considering the primary purpose of having an irrigation system, we strongly advocate incorporating an emergency main filler in the storage tank to counteract extended water shortages. This precaution is particularly indispensable for rain harvesting tanks, ensuring a steadfast water supply even in unforeseen circumstances. By implementing such measures, the irrigation system not only becomes resilient but also guarantees uninterrupted water availability for your garden’s needs. In essence, strategic planning and integration of supplementary components enhance the robustness and reliability of the irrigation infrastructure, aligning it with the principles of efficient and sustainable water management.
Surface water
One of the most common water sources for irrigation is surface water, which includes rivers, lakes, and reservoirs. Surface water is easily accessible and can be readily diverted to irrigate fields and gardens. However, the quality of surface water can be influenced by various factors such as pollution, sedimentation, and variable flow rates, making it crucial to regularly monitor and treat the water before using it for irrigation.
Groundwater
Groundwater is another important water source for irrigation systems. It refers to the water stored beneath the Earth’s surface in aquifers. Groundwater is often extracted using wells or pumps and is generally of high quality, as it has been naturally filtered through layers of soil and rock. However, excessive extraction can lead to groundwater depletion, causing long-term environmental consequences such as land subsidence and saltwater intrusion in coastal areas.
Rain Harvesting
Rainwater harvesting is an increasingly popular water source for irrigation, particularly in areas with limited access to surface or groundwater. This method involves collecting and storing rainwater from rooftops or other catchment areas. Rainwater is generally clean and free from contaminants, making it ideal for irrigation purposes. However, the availability of rainwater can be highly variable, requiring efficient storage systems and careful planning to ensure a consistent water supply during dry periods.
Grey Water
In addition to these natural water sources, treated wastewater, also known as reclaimed water, grey water or recycled water, is being used for irrigation purposes. This water is treated to remove contaminants and pathogens, making it safe for irrigation without posing health risks. Treated wastewater can be a valuable resource, especially in water-stressed regions, as it reduces the demand for freshwater while also providing nutrients to the soil. However, careful monitoring and adherence to regulations are necessary to ensure the proper treatment and safe use of reclaimed water.
When considering water sources for irrigation, several factors must be taken into consideration. These include the availability and reliability of the water source, the water quality, the cost and feasibility of extraction or treatment, and the environmental impacts associated with each option. It is essential to implement sustainable water management practices that minimize waste, promote efficiency, and prioritize the long-term viability of both the irrigation system and the surrounding ecosystems.
In conclusion, water sources for irrigation systems are crucial for maintaining the health and productivity of landscapes. The choice of water source depends on various factors, and each source has its own unique characteristics and considerations. By carefully selecting and managing water sources, sustainable irrigation practices can be implemented, ensuring the longevity and vitality of our landscapes while minimizing the impact on the environment.
Here are some common water sources utilized in irrigation
| Mains water supply | Rain Harvesting | Borehole | Live water | Grey water | |
| Installation costs | low | high | high | medium | high |
| Reliability | reliable | depending on rainfall pattern (emergency source required) | high | various | depending on potential |
| Compliance for plants | medium | medium | depending on water treatment | high | low |
| Adherence to local regulations | avoiding cross contamination | high | groundwater extraction regulations | up to 20m3/day free use* | groundwater extraction regulations |
| Environmental impact | high | no | low | various | medium |
| Operating costs | high | low | medium | low | medium |
Choosing the Right Water Source:
The selection of an appropriate water source depends on several factors:
- Availability: The consistent presence of water in the chosen source.
- Quality: Ensuring the water meets the required quality standards for irrigation.
- Cost: Considering the financial implications of accessing and utilizing the water source.
- Sustainability: Balancing water extraction with environmental sustainability.
Ultimately, the choice of a water source involves a comprehensive evaluation of these factors, aligning with the specific needs and conditions of the irrigation system. Proper water source selection contributes to the efficiency, sustainability, and success of the overall irrigation strategy.
Installing an irrigation system is a challenge as we have to work in and with the live nature. There are unknown soil conditions like earth patches, old building structures, hidden pipes and thick roots. Some of them can be avoided, some need design amendment whilst others turn out after a while. Climate, weather conditions and soil structure makes the things even more unsure. This is why we provide our Aftercare Service.
We desing and install our systems by our best knowledge based on the survey information but it will still remain a general layout. They show their real values and possible weaknesses in the following season only. Having an irrigation system is longer learning process for you and sometimes for us.
Take An Example
Just an example: imagine that you have a simple rectangle lawn with no surrounding trees or large plants. The layout is simple: popup sprinklers can water it even distance from each other. The turf is perfectly evenly covered after the installation. But after half year you discover that quarter of the lawn is always soaked. Why?
Because there’s a waterproof clay layer close to the surface but under the installation depth. How should we know about? No way. How should you know about? No way.
Fortunately we provide a professional Aftercare Service. Next time, when our engineer is in your area, he will visit you and replace one or more nearby popup nozzles and/or adjusts the sprinklers not to hit the area that often or don’t deliver that much water than before. Problem sorted.
There are other examples to mention but the point is: you won’t be left alone with any problems on your irrigation system.
What Do We Provide In Our Aftercare Service?
We have an online Irrigation LIbrary with full of articles about different irrigation system components, their maintenance, also maintenance guides and some videos to learn from.

Dive Into Our Irrigation Library
…and learn about different parts of irrigation systems
We are always available via What’sApp, phone or our ticketing system and any of your concerns will be answered shortly, including guides and advices.
You can turn to our chatbot shortly to get the essence of our knowledge library concentrated on your problem only.
If you have a smart controller connected to the internet, then we are happy to amend or revise your irrigation program.
Finally our engineers can be booked to visit you with one of our well-equipped vans and sort the non-predictable problems in your system’s first season for free. If you have a traditional controller then we can revise your irrigation program during this visit by request.
Please see our Terms And Conditions for more details.
It’s all beyond the first year free maintenance offered with our newly installed irrigation systems (T’s&C’s apply.)
Of course we are ready to help with any other issues in our call-out service, or for customers with systems that not installed by us. And we supply the usual Two-Visit Maintenance Service for garden irrigation systems.
Understanding the Significance of Regular Maintenance for Your Garden Irrigation System

A garden irrigation system is a valuable asset for any homeowner or gardener. It ensures that your plants receive the necessary water they need to thrive and grow. However, like any other system, it requires regular maintenance to function efficiently and effectively. Understanding the significance of regular maintenance for your garden irrigation system is crucial to ensure its longevity and optimal performance.
Regular maintenance helps identify and address potential issues before they become major problems. By inspecting your irrigation system regularly, you can detect leaks, clogged nozzles, or broken pipes. These issues, if left unattended, can lead to water wastage, increased utility bills, and even damage to your plants and landscape. Regular maintenance allows you to fix these problems promptly, saving you time, money, and resources in the long run.
Moreover, regular maintenance ensures that your garden irrigation system operates at its peak efficiency. Over time, dirt, debris, and mineral deposits can accumulate in the system, affecting its performance. By cleaning and flushing the system regularly, you can prevent clogs and blockages, ensuring that water flows smoothly to all areas of your garden. This not only promotes healthy plant growth but also helps conserve water, an increasingly precious resource.
Key Benefits of Regular Maintenance for Your Garden Irrigation System
Regular maintenance of your garden irrigation system offers several key benefits that go beyond just saving water and money. Firstly, it helps maintain the overall health and beauty of your garden. By ensuring that your plants receive the right amount of water at the right time, you can prevent under or over-watering, which can lead to plant stress, disease, or even death. A well-maintained irrigation system helps create an optimal growing environment for your plants, resulting in lush, vibrant, and thriving gardens.
Secondly, regular maintenance helps enhance the curb appeal and value of your property. A well-maintained garden with a properly functioning irrigation system adds aesthetic value to your home. It creates an inviting and visually appealing landscape that can impress visitors and potential buyers. In fact, studies have shown that a well-maintained garden can increase property value by up to 20%. By investing in regular maintenance for your garden irrigation system, you are not only preserving the beauty of your garden but also adding value to your property.
Lastly, regular maintenance helps you save time and effort in the long run. By addressing minor issues promptly, you can prevent major breakdowns that may require extensive repairs or replacements. This saves you from the hassle of dealing with unexpected problems and the inconvenience of having to manually water your garden. With a well-maintained irrigation system, you can enjoy the convenience of automated watering, allowing you to focus on other gardening tasks or simply relax and enjoy your outdoor space.
Essential Steps for Maintaining Your Garden Irrigation System
Maintaining your garden irrigation system doesn’t have to be a daunting task. By following a few essential steps, you can ensure its longevity and efficiency. Firstly, regularly inspect your system for any visible signs of damage, such as leaks, broken sprinkler heads, or damaged pipes. Address these issues promptly to prevent further damage and water wastage.
Secondly, clean and flush your irrigation system at the end of the season. This involves removing any dirt, debris, or mineral deposits that may have accumulated in the pipes, nozzles, or filters. Even better to flush the pipes with compressed air together with the winterizing. Flushing the system with clean water helps remove any remaining debris and ensures that water is distributed evenly throughout your garden.
Thirdly, adjust your irrigation system according to the changing seasons and weather conditions. As the weather gets hotter or cooler, your plants’ water requirements may change. Adjust the watering schedule and duration accordingly to avoid over or under-watering. Additionally, consider upgrading to smart controllers that is able to use historical and forecasted weather data for adjusting the watering schedule based on the weather conditions automatically.
The Gardener’s Rain recommends installing smart flow meters to follow water consumption and get instant notification about system malfunction.
Expert Tips to Ensure Longevity and Efficiency of Your Garden Irrigation System
To ensure the longevity and efficiency of your garden irrigation system, here are some expert tips to keep in mind. Firstly, perform regular maintenance checks during the off-season or when the system is not in use. This allows you to identify and address any issues before the watering season begins. It also ensures that your system is ready to go when you need it.
Secondly, consider investing in a professional inspection and maintenance service twice a year including preparation for winter and spring recommission. A trained technician can thoroughly inspect your system, identify any hidden issues, and provide expert advice on how to optimize its performance. They can also perform more complex tasks such as adjusting water pressure, replacing worn-out parts, or upgrading outdated components.
Lastly, keep a record of your maintenance activities and observations. This helps you track the performance of your irrigation system over time and identify any recurring issues. It also serves as a reference for future maintenance tasks and allows you to make informed decisions about system upgrades or replacements.
In conclusion, regular maintenance is essential for the optimal performance and longevity of your garden irrigation system. It helps identify and address potential issues, ensures efficient water distribution, and promotes healthy plant growth. By investing time and effort in maintaining your irrigation system, you can enjoy a beautiful, thriving garden while conserving water and adding value to your property. Remember to follow the essential steps and expert tips outlined above to ensure the longevity and efficiency of your garden irrigation system.
Increasing the value of your property doesn’t necessarily mean investing in an expensive renovation or remodeling your entire home. Sometimes, all it takes is a simple upgrade in your garden or lawn. A nice garden for example may increase the property value by even 20%! If you already have a beautiful garden, then another such upgrade can boost your property value further: installation of an automatic irrigation system. Not only does an efficient automatic irrigation system help in maintaining a lush, green landscape, but it also offers several other benefits which we will explore in this article.
Why an Automatic Irrigation System Boosts Property Value
An automatic irrigation system can be a game-changer for your property value for a plethora of reasons. First off, it shows prospective buyers that you care about the upkeep of your property, especially the greenery. A well-manicured lawn can be a real selling point and reflects the overall maintenance of the home. Secondly, an automatic system saves a considerable amount of time and effort compared to manual watering. This convenience is a feature that many homeowners are willing to pay extra for. If you want to know how a smart irrigation system works, then this article is for you.
Moreover, automatic irrigation systems are eco-friendly, as they reduce water wastage through precise water distribution. With an increased awareness about water conservation and eco-friendly practices, a property with an efficient automatic irrigation system becomes even more appealing. The utility cost savings from reduced water usage can also be a significant financial incentive for potential buyers.
Installing an Automatic Irrigation System
Installing an automatic irrigation system using high-quality parts is a relatively straightforward process compared to the impact in increasing the property value, that can be done by a professional in a few days. The first step involves designing a layout for your irrigation system that maximizes coverage of your lawn or garden and meet the legal requirements. Next, trenches need to be dug for the piping and sprinkler heads.
Following the trenching, the pipes are laid and connected to the water source. This is followed by installing the sprinkler heads at appropriate locations to ensure optimal coverage. The final step involves setting up the control box, which allows you to program the irrigation system as per your needs. It should be noted that while installing an irrigation system can be a DIY project, hiring a professional might be a better idea if you’re unfamiliar with the process, to ensure that everything is installed correctly and functioning optimally.
The Long-Term Benefits of an Automatic Irrigation System
In the long term, an automatic irrigation system can help save a significant amount of money on water bills through efficient water usage. In addition to this, you also save time that would otherwise be spent on manually watering your plants or lawn. This time can be put into other tasks or simply enjoyed as leisure time.
Moreover, an automatic irrigation system assures a healthier landscape. It can provide consistent and appropriate amounts of water to your plants, ensuring they grow robustly. Over time, this can result in a visually appealing and vibrant outdoor space that can definitely boost the curb appeal of your property.
In conclusion, while getting an automatic irrigation system installed might require an upfront investment, the potential boost to your property value, along with the long-term benefits, make it a worthwhile venture. Not only does it provide convenience and efficiency, it also serves as a testimony to your environmental consciousness and care for your property. So, if you are considering ways to increase your property value, give some serious thought to installing an automatic irrigation system.
Dive Into Our Irrigation Library
…and learn about different parts of irrigation systems
The concept of retrofit rain harvesting is not new, but its adaptation in urban areas is gaining momentum. This environmentally-friendly solution for water scarcity offers a sustainable way of reducing our water footprint by collecting and reusing rainwater. However, while retrofit rain harvesting has significant environmental benefits, it also presents several costs and challenges that need to be considered. This article aims to evaluate the financial implications and obstacles associated with retrofit rain harvesting.
Assessing the Financial Implications of Retrofit Rain Harvesting
Retrofit rain harvesting has an upfront cost which is often the most significant financial obstacle. The cost includes the price of the equipment such as the water tank, gutters, filters, pumps, and other installation materials. Additionally, there is the labor cost for the installation of the system. The total expense can range from a few thousand pounds to the sky, depending on the size and complexity of the system.
However, it’s crucial to evaluate these costs in the context of long-term benefits. A well-designed retrofit rain harvesting system can lead to substantial savings on water bills. By using harvested rainwater for non-potable needs such as irrigation and washing cars, the reliance on municipal water can be reduced, thus lowering the water bills.
Using rain water for watering garden plants is the most natural way and the best water source for them.
Moreover, some regions offer financial incentives in the form of rebates or subsidies for installing rainwater harvesting systems, which can offset the initial installation costs. It’s important to inquire about such programs in your local area. Additionally, since rainwater harvesting contributes to sustainability, the property value might increase, making it a sound long-term investment.
The cost of maintaining a rainwater harvesting system is another factor to examine. Regular inspection and maintenance are necessary to ensure the system works efficiently. This includes cleaning of gutters, filters, and the tank, which could mean additional costs if professional services are employed.
Key Aspect: The Scaling
Unless we are forced to store as much rain as possible, then the designing starts here. At retrofitting rain harvesting it used to come from the other direction: the first thing to know is the amount of water that will be used regularly. We used to advice storing 3-4 liters water for every squaremater of the garden surface, where the irrigation is necessary.
It means that 3 m3 of water is sprayed over on 1000 sqm a day or 100 sqm on 20 days (watering every 2nd day only). This is acceptable amount of water in the UK summer days.
We only can guess from this point, as the weather is as sure as the weather 🙂 But let’s say that a long 30-day drought period is usual twice in a year but there are rainy days between them so take that 30-day into consideration.
When the space is not an issue, then 4.5 m3 capacity is acceptable for every 100 sqm. For knowing your size, just grab your tape measure and take the numbers from your garden!
See The Numbers: Does It Worth Compared To Mains Water?
You can easily get answers for costing a tank via a web search but can’t get it for installing the tank. But there are lots to consider inlcuding approaching the area with machines, storing the soil, moving the tank and concrete, etc. Better to get in touch with a builder and request a quote for the whole process.
But for our example, let’s say that the cost for installing a 10m3 tank is 10 thousand pounds in 2024. Taking the shortcut: it means every liter of rain water saved need 1 £/l initial investment. And this is the time when you should have a look on your water bill: how much is a m3 (1000 l) mains water? It is influenced by some other circumstances but somewhere below 2£/m3. That’s 0.002£/liter! From other point of view, you will invest your money for an invisible 0.002% interest.
We don’t want to talk you out of having rain harvesting, as it’s good for the plants, can reduce your usage bills and key for the environment. We just wanted to call your attention to the numbers.
Of course, a rain harvesting tank may improve the property value and then the final balance may be positive. And it’s also possible that you must install rain harvesting equipment due to local regulations. But strictly looking at the retrofit rain harvesting: it is not a profitable investment.
How to cut rain harvesting costs back further when you want irrigation system? Book a survey with us and get professional advice!
Navigating the Hurdles in Retrofit Rain Harvesting Implementation
While retrofit rain harvesting can be a highly resourceful practice, it doesn’t come without its challenges. For instance, the lack of space for installation could be a significant issue in densely populated urban areas. The system requires enough space for the storage tank and the piping network, which might not be possible in some properties.
It’s a very popular solution to use underground storage tanks if there are unused spaces, like under the terrace. Unfortunately retrofitting a tank under existing surfaces may lead to some unsolvable problems. Including but not limited to moving existing services, breaking up the paving, taking away the soil, etc.
Another problem relates to legislation and regulations. In some jurisdictions, there might be restrictions that limit the use of rainwater or the installation of harvesting systems. It is therefore crucial to familiarize oneself with local laws and regulations before beginning the setup process.
Also, collecting and storing rainwater can sometimes lead to water quality issues, especially if proper maintenance is not carried out. Bacteria, algae, and other pollutants can contaminate the water, affecting its usability. It is imperative to ensure that the harvested rainwater is treated and filtered appropriately for its intended use.
Lastly, the varying and unpredictable nature of rainfall can pose a challenge. Rainwater harvesting is highly dependent on rainfall patterns. In areas with lower rainfall, the benefits of the system may not be fully realized. Therefore, it is important to consider local climate and weather patterns when planning a rainwater harvesting system.
In conclusion, while retrofit rain harvesting presents a strategic solution to water scarcity and sustainability, it also involves significant costs and challenges. The financial implications, regulations, space constraints, and weather patterns are all critical factors to consider when evaluating the feasibility of retrofitting a rain harvesting system. Nonetheless, with careful planning and consideration, the benefits of rainwater harvesting can significantly outweigh the challenges, making it a worthwhile investment for a sustainable future.

Irrigation System Installation oN A Large Property Near Peterborough
Popups On The Main Lawn Area
Let me introduce you one of our most sophisticated irrigation system of a large property near Peterborough, that was installed last year.
Originally we were enquired to install popup sprinklers only for part of the main lawn area in front of the main terrace. This seemed a fairly simple job with around 12 sprinklers. To learn more lawn watering solutions, click here.
I have chosen the well-working Hunter PGP Ultras due to their flexibility in operating distances and angles. The 4″ tall stems are used widely where the lawn is cut regularly and they able to spray over on it.
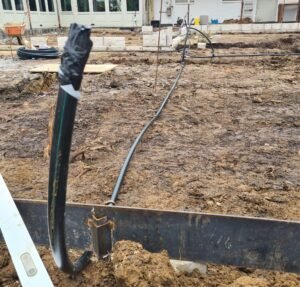
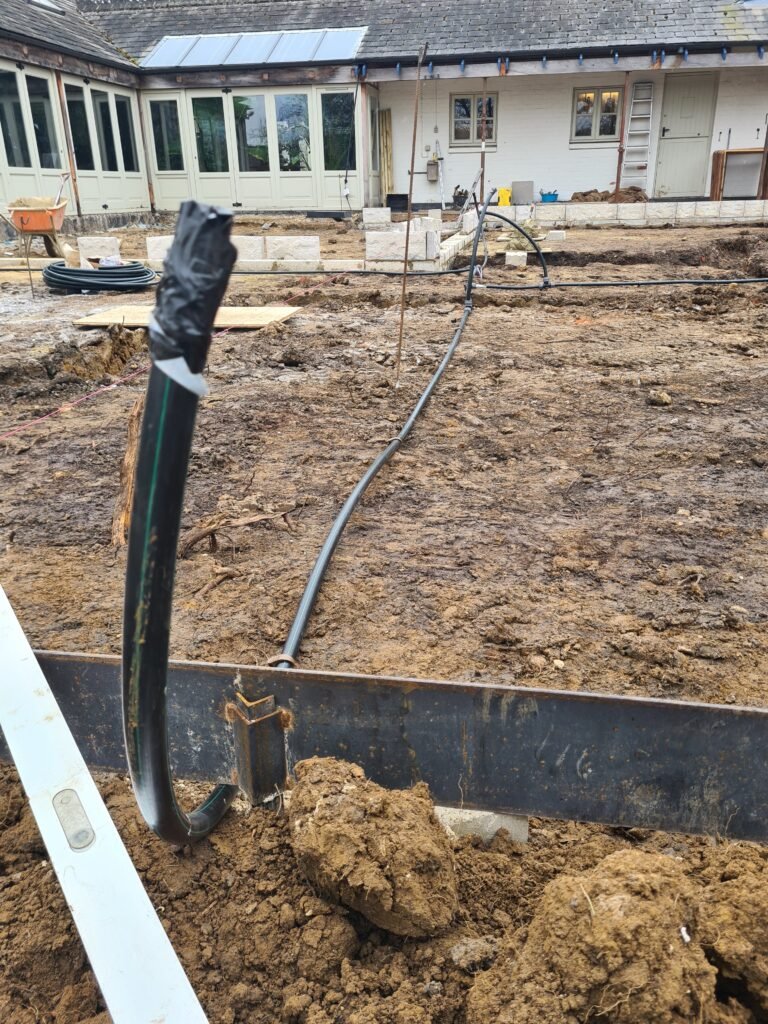
Because the original lawn has been ripped off, then the installation was easy. Just cut up the trenches in the right depth with our handy machine, then lay the pipes in the trenches conveniently.
And we had to take a halt here because the borehole hasn’t been drilled hence no water has been provided for the lawn.
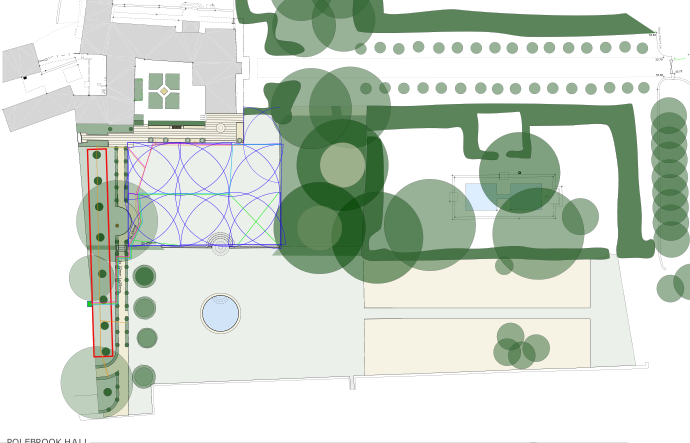
The first Layout
Only part of the main lawn was requested as part of the irrigation system. Initially.
This is why the drawing above includes the popup sprinklers and their feeds only, marked with blue circles and different coloured lines.
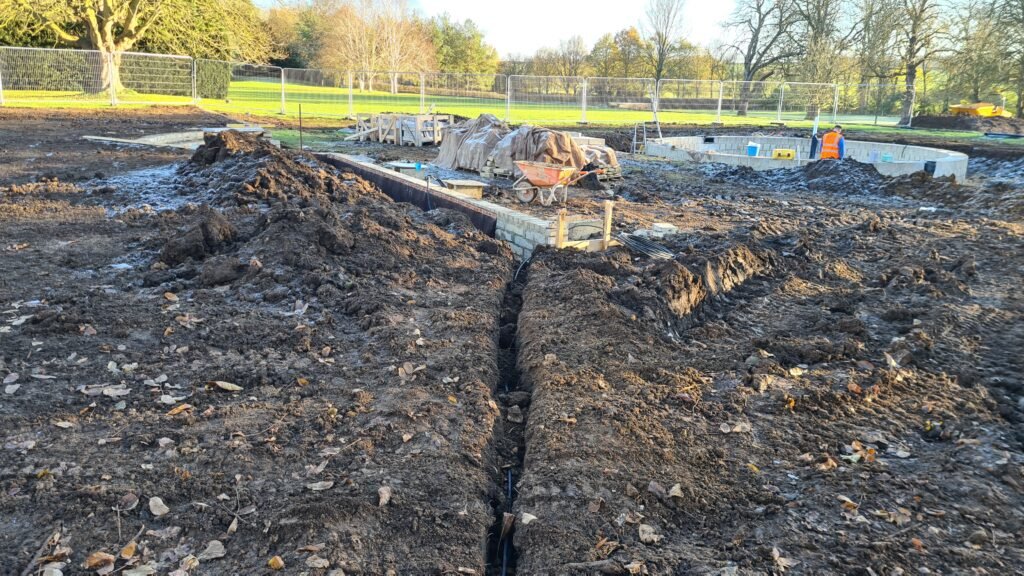
Soilworks
Soil conditions right before laying down the lateral pipes for popup sprinklers.
One of our nice narrow trenches leads to the retaining wall on the image above.
The pipe laying jobs were made with our trenching machine in November.

Digging the trench
I can’t highlight it enough how nice our trenching machine is.
Thanks to its tracks it sticks to the ground strongly. But if the soil is slippery, then we always can put some extra weight (the handler’s weight) on the machine by folding down its stepping platform.
Final level
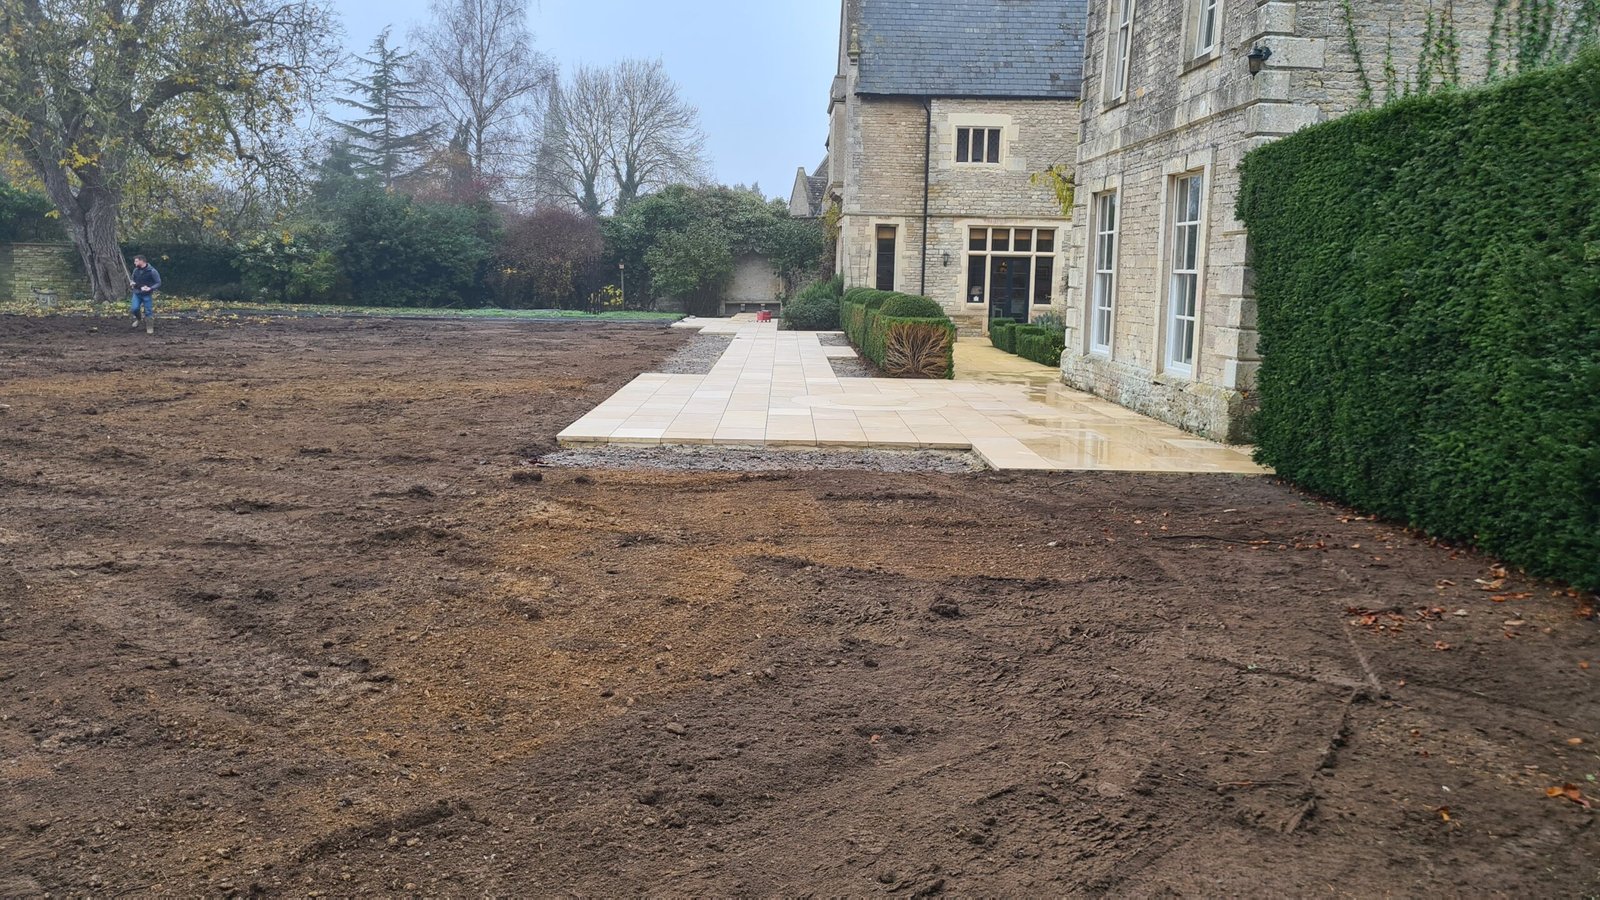
Unfortunately there’s no image about the pipes just laid before the final level has done.
But we were in the right place at the right time to install the pipes and heads before preparation of turfing.
Sprinklers need levelling
Popup sprinklers are invisible most of the time unless they are not levelled perfectly.
At this job, the sprinklers have been installed before the turfing as it happens lots of time. We used to mark them with small flagsso the landscapers won’t ruin them by accident.
Best time for levelling when the turf just been laid. The top of the popup must be half-one inch deeper than the final surface. This makes sure that the lawnmowers/robot mowers can’t cut them.
The Main Lawn Irrigated
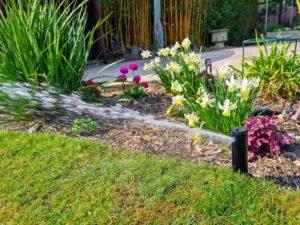
Hunter PGP Ultra one-jet rotary sprinklers are in place with blue nozzles, 11 m from each other.
The sprinklers do their jobs and so do the dogs hence the lawn is “boosted” by ammonium in patches.
Additional Bed Irrigation
We didn’t have to wait too much before the owner decided to have irrigation for the beds around the lawn. It’s always a good decision where thristy plants are in place, like clipped box hedges. I always recommend the irrigation for freshly planted matured shrubs, trees and solitaires. Regular watering is a must for plants with less roots then crown in the first 2-3 years.
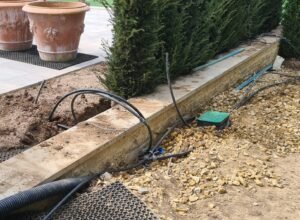
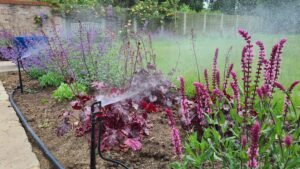
For wide beds with taller perennials, I prefer to install micro sprinklers. In this case, the dripline was required by the landscapers. Covering nearly 300sqm beds with driplines is labor-demanding and we haven’t even talked about hiding the lines with mulch. Following the manufacturer’s itinerary, now there’s nearly 900m dripline has been laid in the surrounding beds.
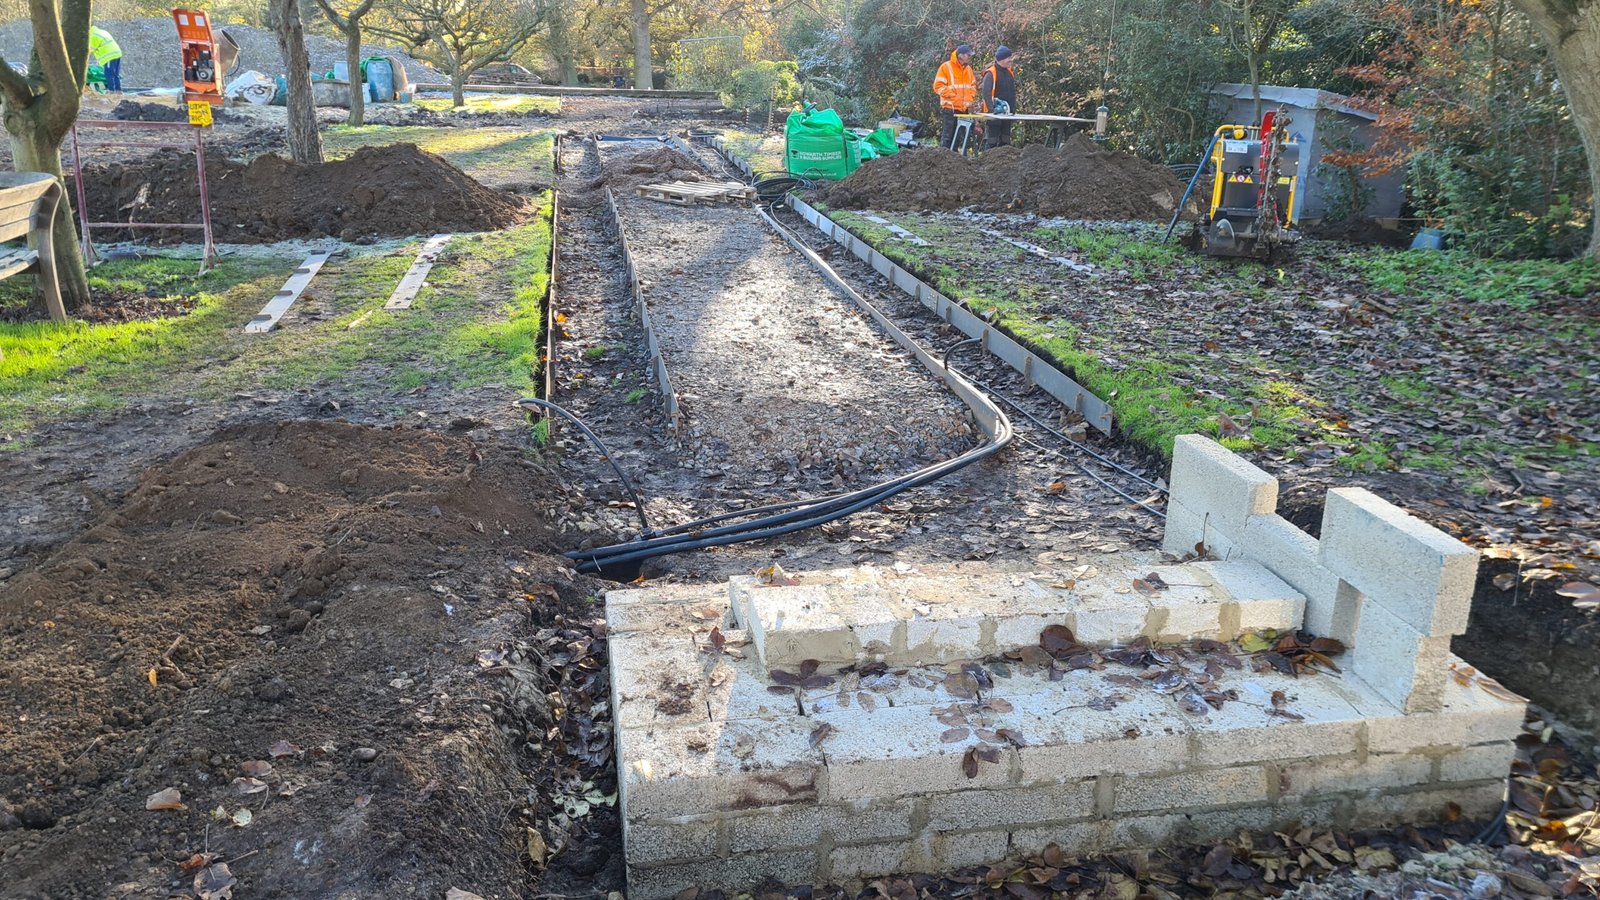
The base of the path
One of the best stage to lay down the feed pipes for the beds on both sides of the path.
The edges are perfectly straightforward hence no chance to make a mistake by leaving the feed tail in a wrong place.
Dripline doesn’t need high pressure for operating so we used 20mm HDPE pipe as feed.
You can discover our trenching machine on the right side of the image.
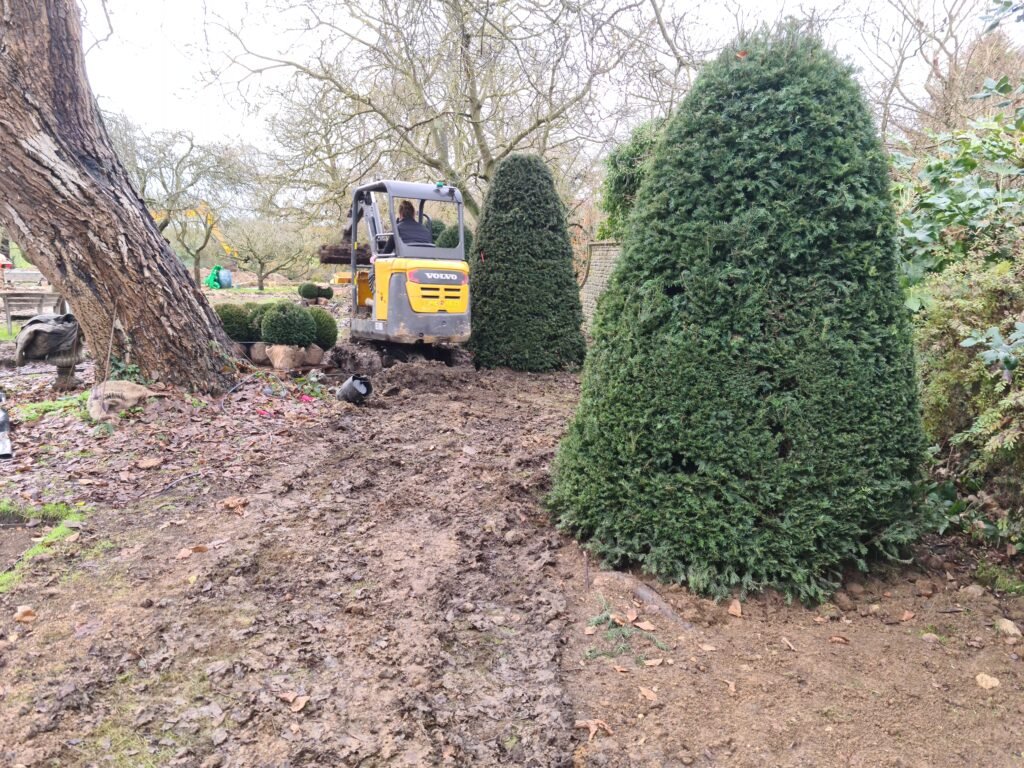
Thirsty Large Solitaires
Nine giant yews have been installed on this site.
This size of plants are delivered with relatively small root balls. Hence they demand lots of water in the first-sceond summer season which can be delivered by an automatic irrigation system reliably.
Compared to the price of a long row of these expensive plants, the irrigation system is a small addition.
The Large Irrigation System Extended Again
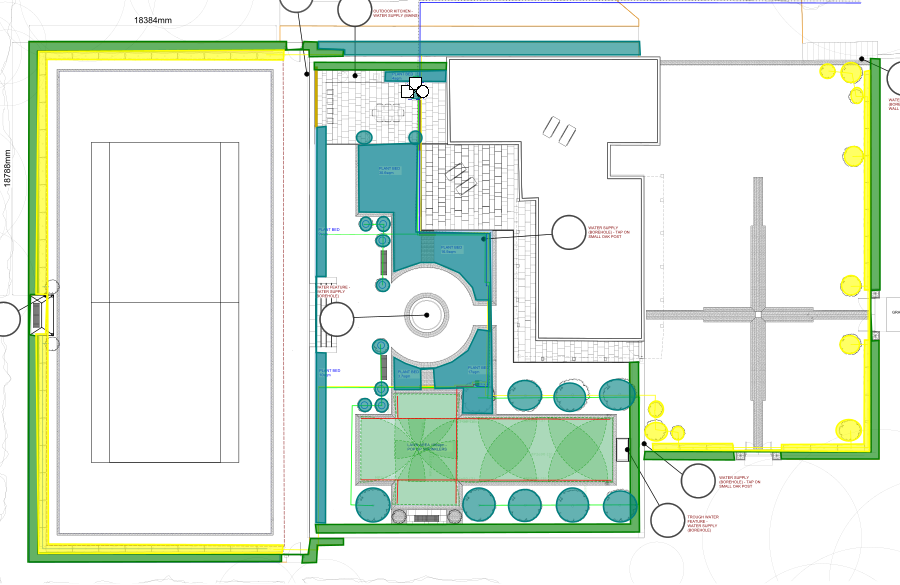
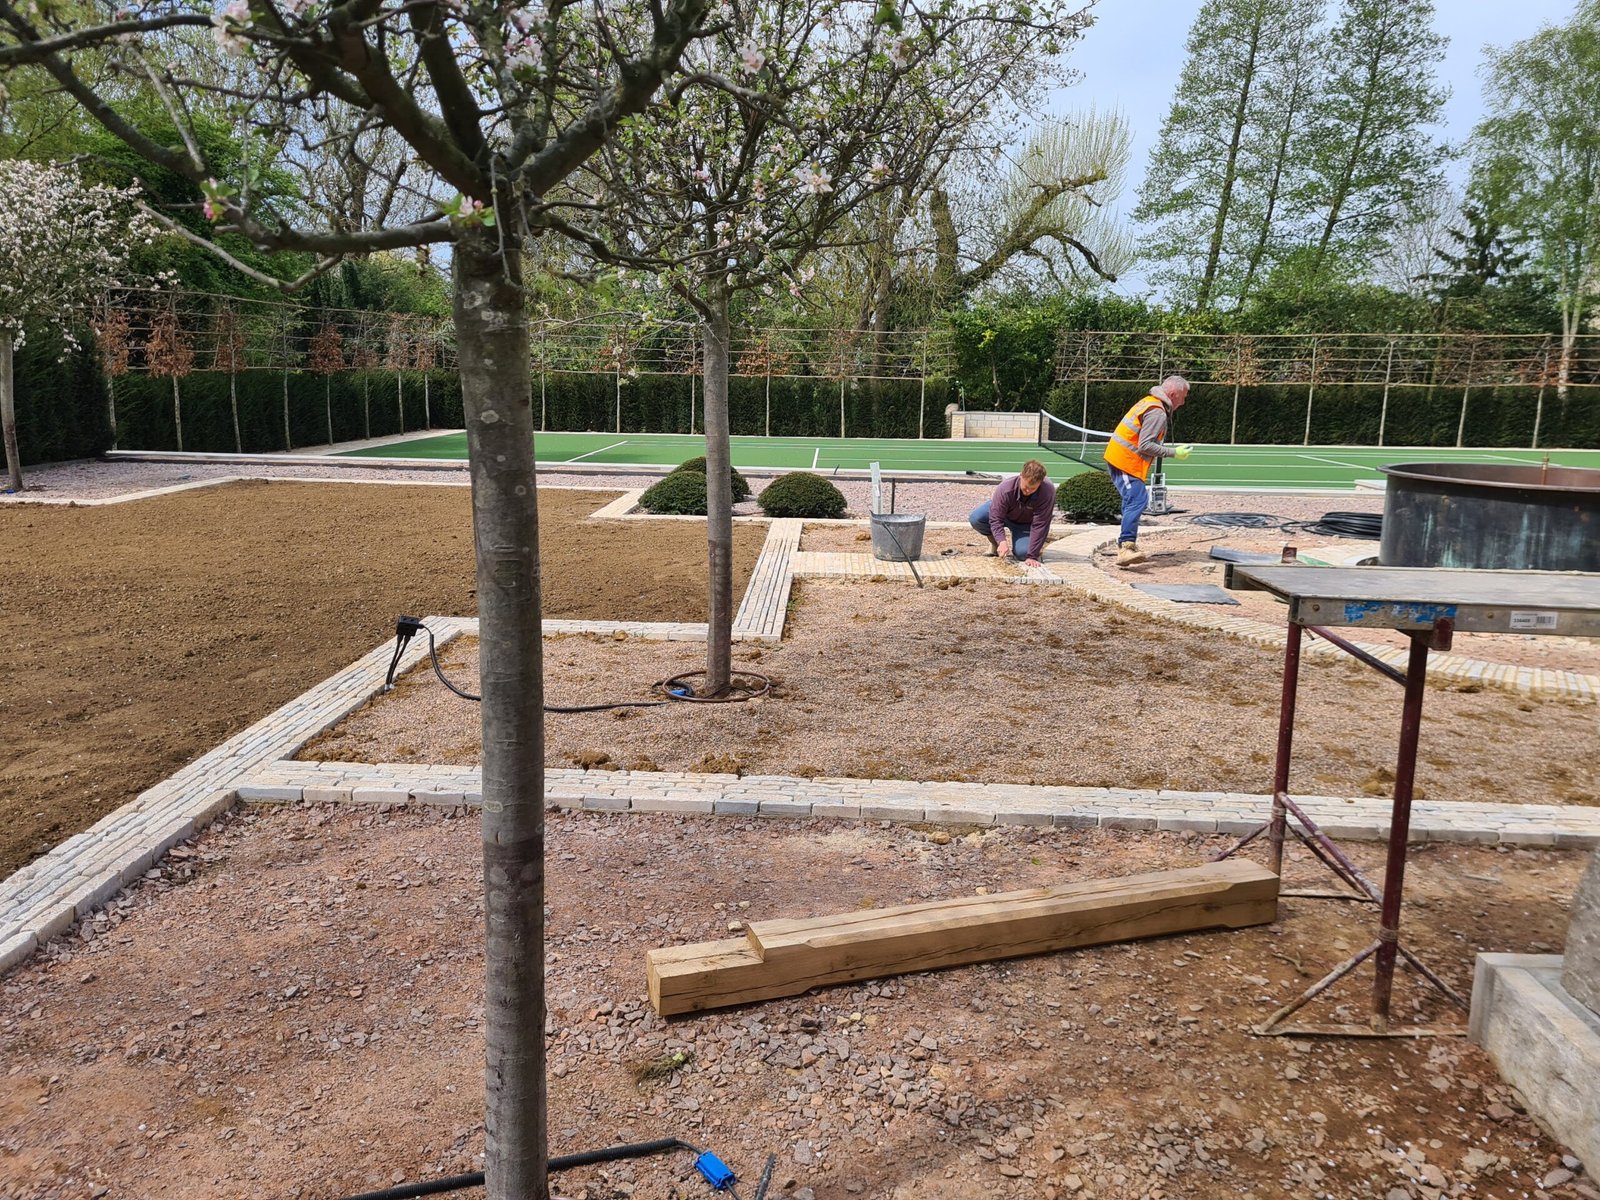
The next stage covered the old piggery garden. This area includes:
- a tennis court surrounded with pleached trees
- a long yew hedge
- a rest area with water features
- a barbecue terrace with large planters around
- small flowering trees
- and a small formal lawn.
On the other side of the building:
- a visitor car park/venue area with semi-hard surface
- surrounded with pleached trees and tall yew hedge.
As the design shows, all yew hedges are connected on the same hedge zone (marked with green) with double dripline.
The pleached trees are designed on a separate tree zone, marked with yellow. All beds are covered by the blue drip zone.
This way the plants with same water demands are fed by the same zone. That can supply even coverage for them.
Feed For Dripline
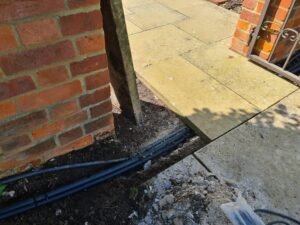
We had a chance to lay down the HDPE feed pipes before the beds were filled up with topsoil and the paths are laid.
This not just made our jobs easier but the feeds got in the right depth to avoid any later disruption at later gardening soilworks.
Because the feeds have been left there for long time, their open ends have been closed by strong tapes.
Working together with other contractors On A large irrigation system
It’s a key question to work together seamlessly with other contractors on landscaping projects. This makes possible to go ahead efficiently.
For example the decorative edges were made together with laying down our feed pipes. Everything was made as designed this way.
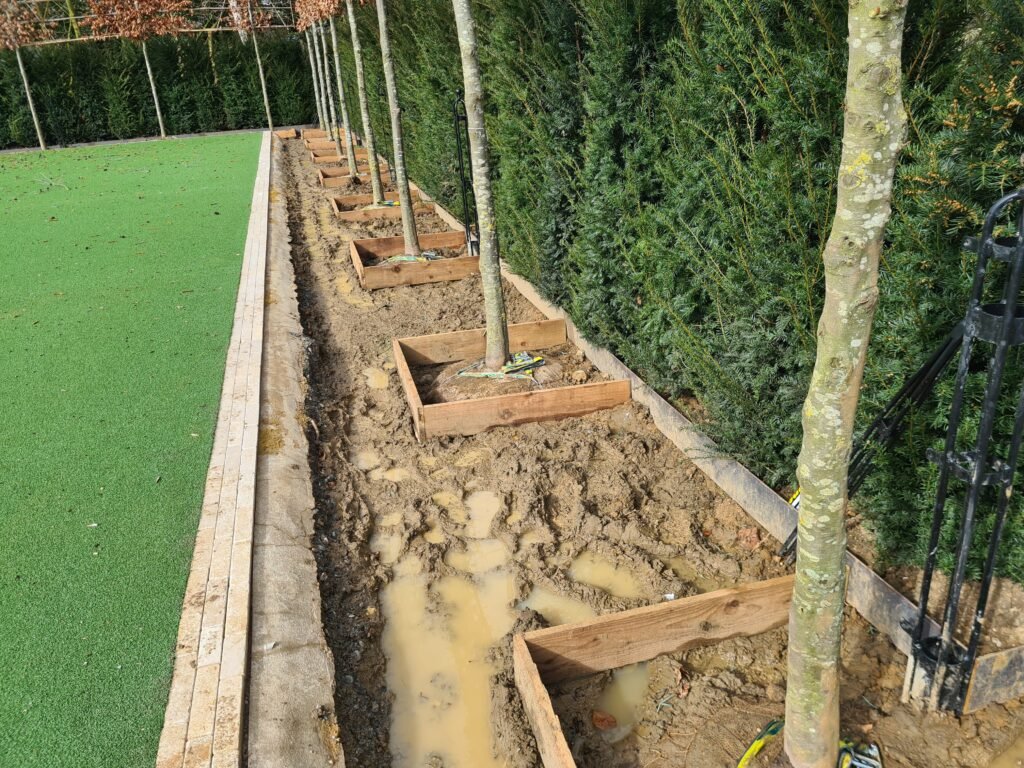
Irrigation for pleached trees VS hedge
Around the tennis court, we installed two separate zones, one for the hedge and one for the treeline. However both of them are in the same location, they have different water demands. It was simply better to split them.
The yew hedge got two lines of drip on their sides. The inserted drip emitters supply even amount of water all along the lines.
And we installed only one feed around the trees and added individually adjustable bubbler to each one of them. This makes possible to supply different amount of water for each tree right at their root ball.
Dripline for wide areas
Dripline is a very efficinet way of watering if the lines are laid as per manufacturer’s recommendation.
Depending on the distance of insterted emitters in the pipe, the lines should be laid same distance form each other. In this case, the emitters distance determines 33cm distance between the pipes for achieving even coverage.
Because the small conifers sit on hard surface that hot in summer, they have their own drip rings around them under the white grindings.
Finished planting
Final stage at the old piggery garden.
The newly planteed perennials haven’t started to cover the dripline but it will happen soon.
Thanks to this complex irrigation system of a large property near Peterborough, these plants won’t suffer in the heatwave.
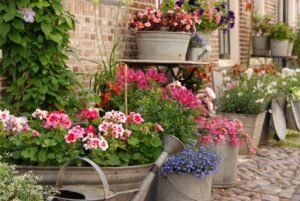
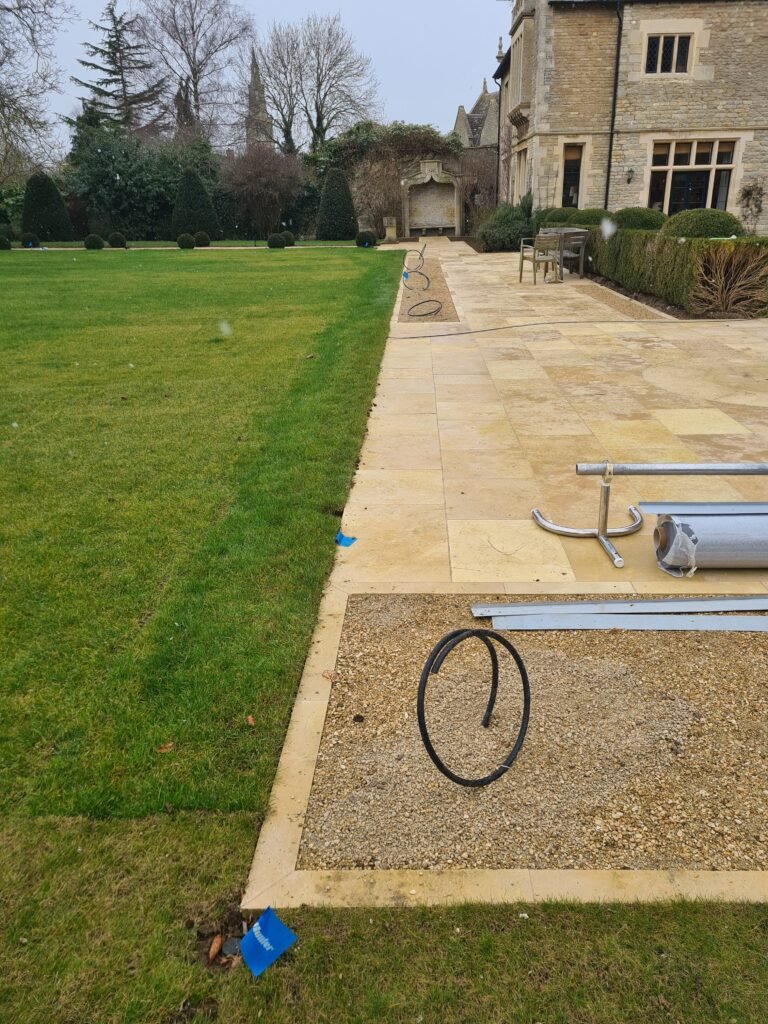
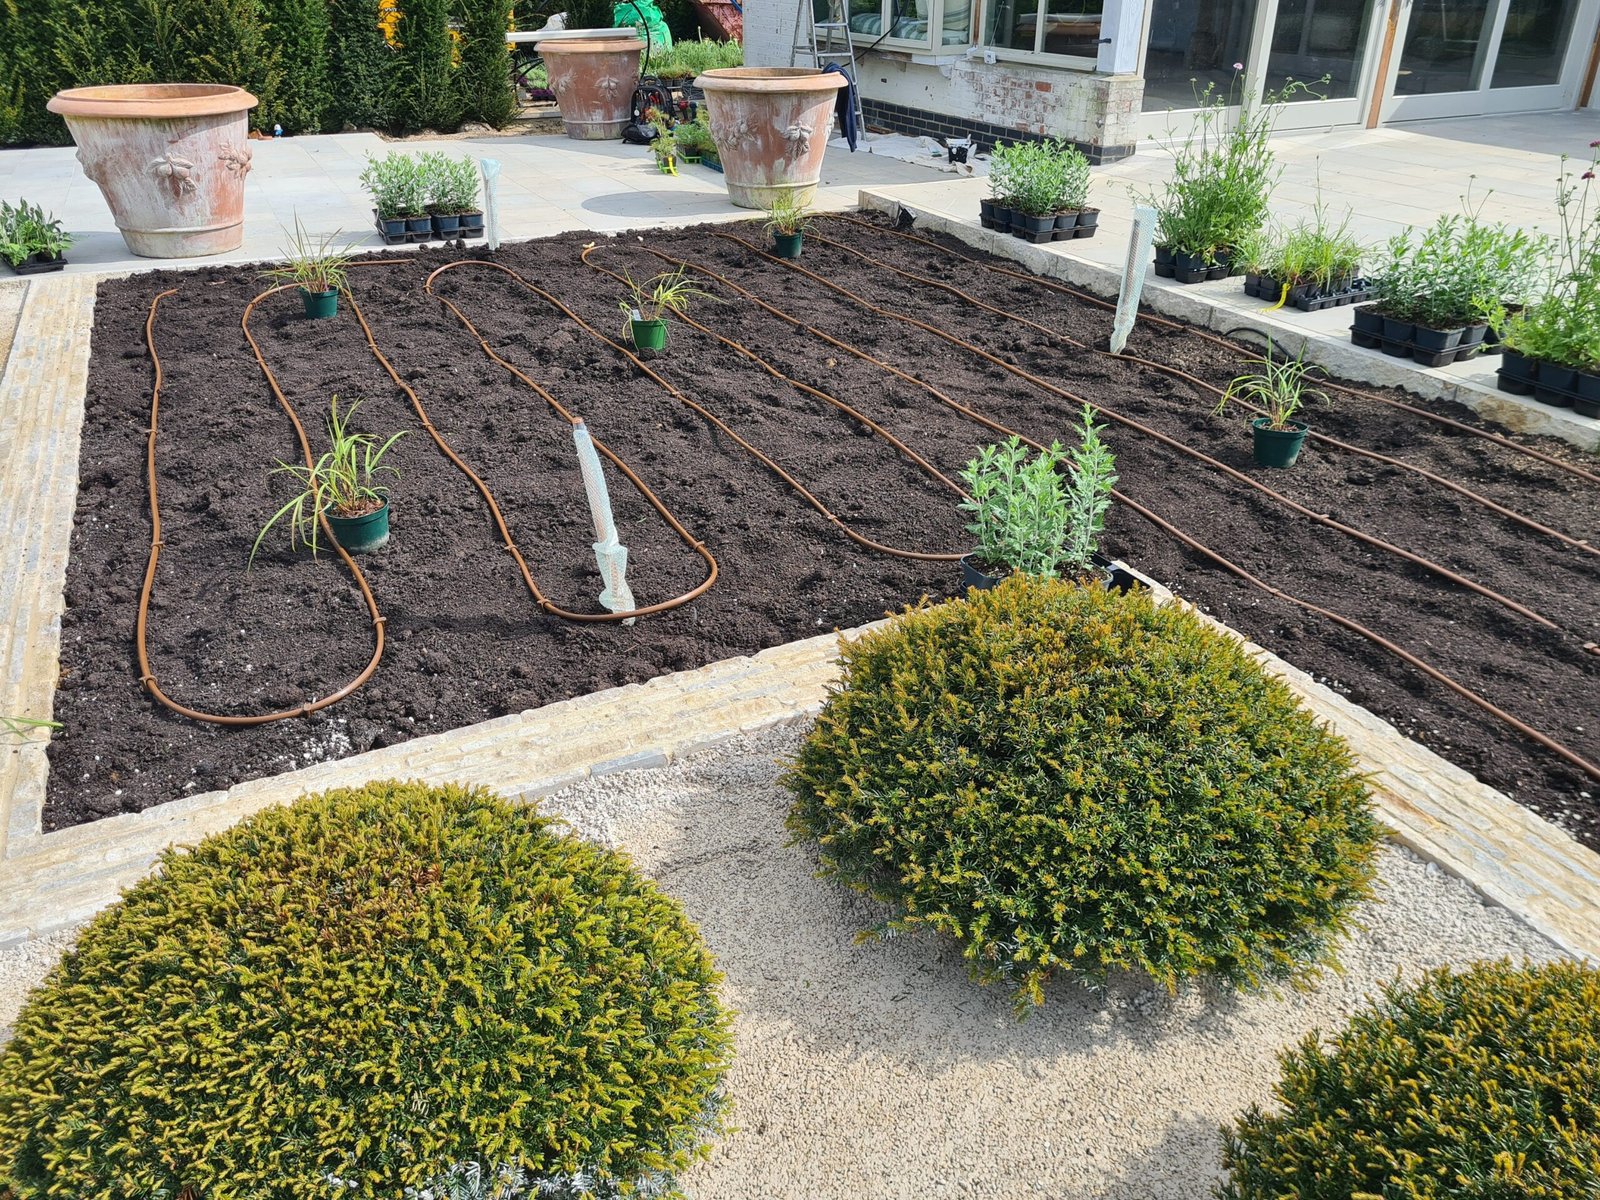
Planters Irrigated
Installing invisible irrigation for planters needs forward thinking on all aspects. As the planters may need more or less water than the surrounding beds, it may worth to add them on a separate zone if possible.
For installing the systme invisibly, the pipes should arrive right under the planters and have to be poken through the drain hole of the planters. So the accurate location of the planters has to be marked before the pipes are laid.
Preparation For Planters
Unfortunately the patio has been done when we were enquired making the yard garden on the left side completely unaccessible for irrigation pipes.
The only area that we could connect to the system here was the row of planters designed over the shingle strip.
The feed pipe runs together with the popup sprinkler feeds along the edge of the lawn and sticking out in the middle of the shingle.

Invisible Irrigation For Planters
Just before arrival of the planters, we asked the landscapers to mark their exact place and extended the feed right under them.
Our special flexi pipes (called funny pipes as well) come up in the middle of the planters before the trees have been planted in.
When the planters are filled, then connecting the dripline and making a loop on the surface of the soil is a piece of cake. Effective and invisible.
Water supply
As I mentioned before, the water supply hasn’t even been designed at the first stage but borehole was demanded.
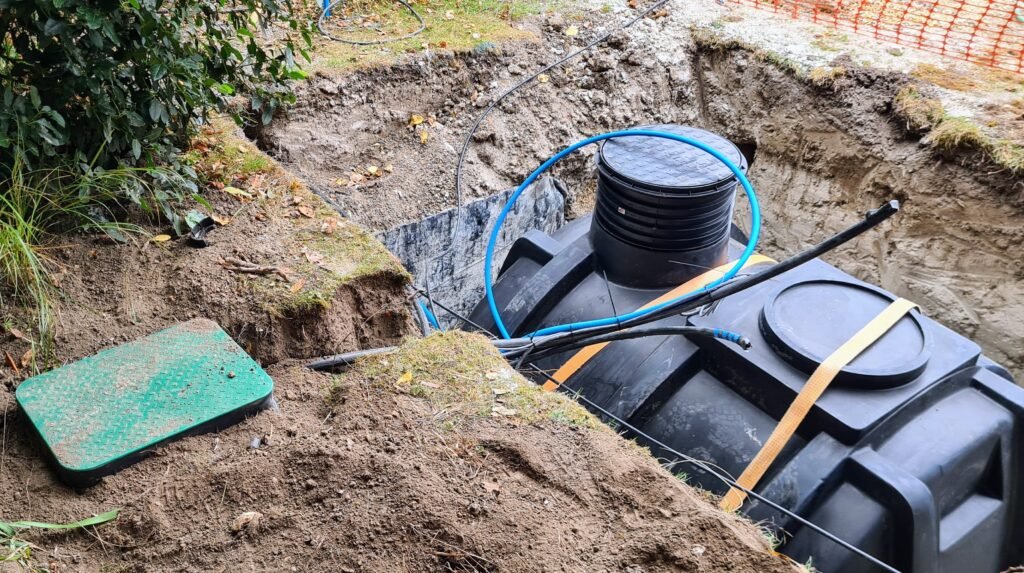
The usual configuration when the flow of the borehole is unknown is installing a tank and filling it up by the borehole pump. Running out of the water in the middle of the irrigation cycle is unavoidable this way.
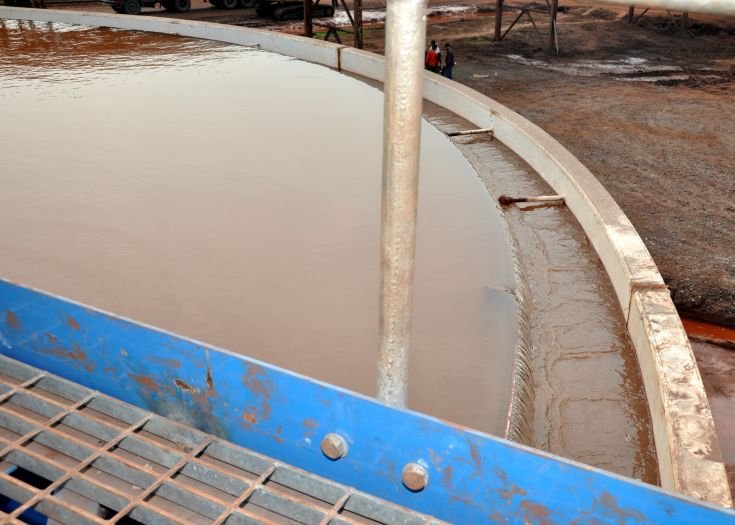
I don’t have images about the tank as it’s a 10m3 underground tank and were installed when I was away. But it’s able to store more than enough water for three irrigation cycles supplying the water for the whole system reliably.
The pump is a premium quality Lowara submersible stainless-steel pump with a DAB pressure switch. When any zone is fired, then the pressure switch is powering up the pump immediately. By using pressure switch, the main feed can even be equipped with garden taps as this is the case on this property as well.
Summary
This large irrigation system was designed and installed together with the constantly changing landscaping process we still managed to keep it in scale. The lawn zones give even coverage thanks to the consistently used nozzles. The drip irrigation zones include similar size and type of plants with almost identical water demands.
Not mentioning the environmental benefits of an automatic irrigation system for large residential properties, like
- Efficient Water Use: Automatic irrigation systems use sensors and timers to deliver the right amount of water at the right time, reducing water wastage compared to manual watering.
- Reduced Runoff: By applying water more precisely, these systems minimize runoff and ensure more water penetrates the soil, benefiting plant roots directly.
- Controlled Watering: By delivering water slowly and evenly, automatic systems reduce the risk of soil erosion that can occur with traditional irrigation methods.
- Weather-Based Adjustments: Many systems use weather data to adjust watering schedules based on current conditions, avoiding unnecessary watering during rainy periods or adjusting for seasonal changes.
- Optimal Watering Schedules: Consistent and adequate watering ensures plants receive the right amount of water, promoting healthier growth and reducing the need for chemical treatments that can harm the environment.
- Efficient Operations: Automatic systems often use less energy than manual systems because they operate more efficiently and can be powered by renewable sources such as solar panels.
- Consistent Moisture Levels: Regular and appropriate watering helps maintain soil structure, reducing compaction and promoting a healthy microbial ecosystem.
- Advanced Technology: Features like drip irrigation and moisture sensors enhance the efficiency of water delivery, ensuring that every drop counts.
- Integration with Smart Technologies: Automatic systems can be integrated with smart technologies and IoT (Internet of Things) devices, allowing for more sustainable management practices and real-time monitoring of water use.
I hope you enjoyed this short introduction of one of our last large residential irrigation system jobs and we have served you with some useful advice regarding automatic garden irrigation. If you want some reasons why you need irrigation system, then read our other article.
System Components
This Library delves into the myriad components that constitute an automatic garden irrigation system. From the intricate details of control units and emitters like pop-up and micro sprinklers, drip irrigation, bubblers, and sprays, to the crucial water inlet equipment including backflow preventers, float switches, float valves, and isolator valves, providing in-depth insights. It serves as a go-to reference for understanding how each component contributes to the overall functionality of the system.
Installation Techniques
A pivotal section of the Library is dedicated to the art and science of installing automatic irrigation systems. It elucidates the steps involved in site assessment, design planning, component selection, and the meticulous execution of the installation process. Whether one is a novice seeking a step-by-step guide or an experienced installer looking for advanced tips, the Library caters to a diverse audience.
Maintenance Protocols
Recognizing the longevity and efficiency of an irrigation system hinge on regular maintenance, the Library offers a compendium of maintenance protocols. From regular inspections, cleaning, and adjustment of emitters to controller checks, sensor calibration, and winterization techniques in freezing climates, the handbook serves as a practical guide to keeping the system in optimal condition throughout the seasons.
In essence, our Irrigation Library is a holistic guide catering to both beginners and seasoned professionals. Its comprehensive collection of articles not only demystifies the complexities of automatic garden irrigation systems but also empowers users with the knowledge and skills needed for successful installation and ongoing maintenance. As an evolving resource, this irrigation library adapts to emerging trends and technologies, making it an indispensable tool in the realm of modern garden irrigation.
The Gardener’s Rain always use the best quality irrigation parts and equipments from market-leader companies.